
I watched a procurement leader lose $20,000 because an overseas factory dismissed a vague complaint email. When a dye lot fails, you need a bulletproof evidence package. We built this process directly from the factory floor using strict ISO AQL 2.5 inspection standards and active dispute playbooks.
Effective After-Sales Support protects cash flow and launch calendars. This intermediate SOP takes two triage hours and one business day to execute. You will learn to negotiate refunds by building a precise defect log, evidence folder, non-conformance notice, remedy matrix, and communication log.
Author’s Verdict: Factory managers respect raw data. Blurry photos get dismissed, but a caliper measurement of a failed seam forces accountability.

Everything You Must Have in Place Before Contacting Your Supplier
In my experience, an organized start prevents emotional, evidence-light disputes. Dedicate two hours to complete this checklist before requesting after-sales support.
-
Documents: Gather your purchase order, manufacturing agreement, tech pack, size chart, final inspection report, invoice, shipment records, and supplier communications.
-
Baselines: Pull the approved golden sample and lab dips. Without physical proof, suppliers easily claim “acceptable variance.”
-
Inspection Tools: Get a measuring tape, metal ruler, and video-enabled phone. Use a neutral-light photo area. Manager Chen warns: “Dark photos hide crooked stitching.”
-
Tracking: Log evidence in a shared defect folder and a cloud QMS. Use a single communication channel.
-
System Access: Verify admin access to your ERP/WMS and platform dispute portal. Secure finance visibility and authority to pause fulfillment.
-
Roles: Procurement owns the claim. QA uses ISO 2859-1 and official textile test methods to classify defects. Ops confirms commercial impact. Finance approves remedies.
⚠️ Safety First: Quarantine products showing safety, labeling, or chemical risks immediately. Stop customer shipments until you assess the hazard. Never resell questionable units.
How to Handle Defective Apparel Shipments? A 6-Step Guide to Factory Claims
Step 1: Establish the Contractual Baseline and Defect Taxonomy
Start by gathering your exact approval baseline. Pull the purchase order terms, signed spec sheet, tech pack, and approved sample. Retrieve the color standard, packaging approval, and agreed AQL language.
Factories push back hard against emotional complaints. You must tie every claim to a documented standard. Do not accept a vague “industry norm” invented after the fact. Rely strictly on the industrial fabric tolerance stated in your contract.
During a recent polyamide fabric inspection, QA Inspector Lin demonstrated the physical reality of these failures. A sizing miss feels obvious when the tape measure overshoots the approved tolerance line by a full inch.
Seam slippage looks like a row of teeth exposing themselves under light stretch. Color shading appears muddy and uneven under neutral daylight.
Build a defect taxonomy table in a shared spreadsheet. For larger teams, configure this directly in your ERP or QMS.
| Defect Class | Description | Apparel Examples |
|---|---|---|
| Critical | Fails safety or legal standards. | Sharp needle in seam; missing origin label. |
| Major | Impacts fit or structural integrity. | Seam slippage; measurement variance; misaligned print. |
| Minor | Small cosmetic flaw. | Uncut loose thread; minor packaging crease; fabric dust. |
Write explicit text descriptions for visual cues in your table. Do not rely on color-coded red and green highlights, ensuring total accessibility for screen readers and colorblind users.
You will know this step is complete when you possess a one-page standard. It must dictate exactly what defect class applies to each issue before any counting begins.
🧠 Author’s Take: I always finalize this matrix before emailing the supplier. Raw, contractual metrics force immediate accountability. Angry, unstructured emails just get ignored.
— Bob Liu, Supply Chain Management Expert
Step 2: Quarantine the Defective Lot Immediately
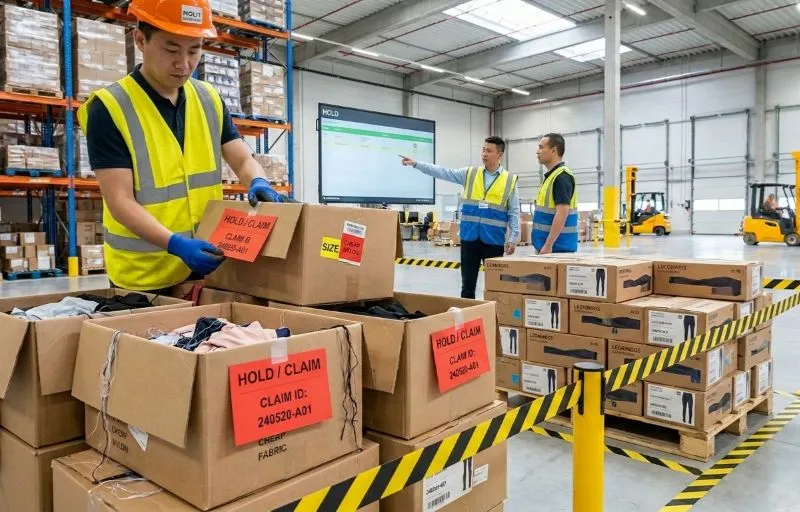
When I walk an inbound warehouse floor, a bad shipment feels instantly wrong. You might spot mismatched size stickers on the pallets. You might feel a stiff, cheap handfeel on the nylon. You might see loose threads spilling out of mixed cartons.
Stop the receiving line immediately. You must isolate the defective cartons in a local QC room or 3PL receiving area. If you use a large facility, trigger WMS status codes and digital bin holds. For smaller operations, move boxes to a manual quarantine zone. Manager Chen always reminds my team:
“Physical separation protects claim integrity.”
Count your defective versus non-defective units. Separate the bad inventory by style, color, size, carton, and lot number. Tag each problem carton with a text-based HOLD/CLAIM label and a unique claim ID. Do not just use visual red stickers. Mark every issue as reworkable, sellable at markdown, or totally unsellable.
Verify your quarantine counts. Your physical totals must reconcile back to the original packing list, receiving report, and WMS inventory counts. Act fast. A blocked FBA prep area threatens your Amazon launch timing and strict platform receiving windows.
⚠️ Experience Warning: Last peak season, a client accidentally mixed defective seamless leggings with good stock. They lost traceability instantly. Once bad units enter sellable inventory, you destroy your evidence and lose your case with the factory.
Step 3: Build the Digital Defect Log and Evidence Portfolio
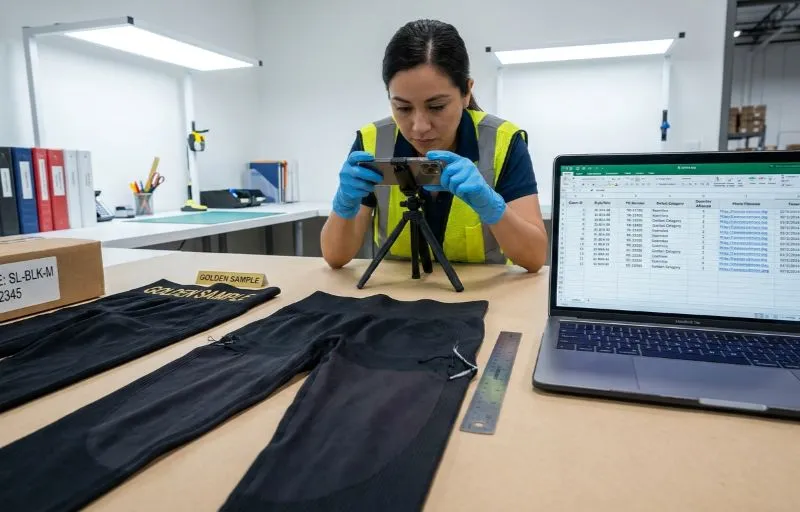
I have watched suppliers dismiss massive claims due to disorganized photo evidence. Listen for the sharp sound of stitches popping under light tension. Look for a visible twist in a side seam. Document these failures immediately.
Set up your digital Defect Log using a shared cloud spreadsheet or your enterprise ERP/QMS. Create your tracking columns first. Include Claim ID, Style/SKU, PO Number, Color, Size, and Carton/Lot.
Add fields for Defect Category, Defect Class, Spec Requirement, and Actual Finding. Finish with Quantity Affected, Photo Filename, Video Link, Inspector Name, and Timestamp.
Follow a strict photo protocol for every unit. Shoot a full-garment front and back image. Take a macro close-up of the flaw. Place a ruler inside the frame to show the exact tape measurement against the approved tolerance. Keep the carton label visible in the shot.
Place one approved golden sample next to the defective unit. This visual contrast exposes the shadow difference in color shading immediately. Record a short video if the problem only appears under movement. Capture clear photographic examples for fabric, stitching, sizing, print, label, and packaging defects.
Enforce strict file naming discipline. Match every image filename directly to the Claim ID. Write plain text captions for every image callout to support screen readers and mobile users. Cite official standards like ASTM D5430 for defect terminology.
Ask a third party to test the system. They must open one log row and locate the matching proof in under 30 seconds.
⚠️ Experience Warning: Factory manager Chen once rejected a $5,000 claim because my QA team named our evidence files “IMG_4091.jpg.” Naming discipline is not optional. Every file must tie back to the log instantly.
Step 4: Calculate the Commercial Impact and Claim Summary
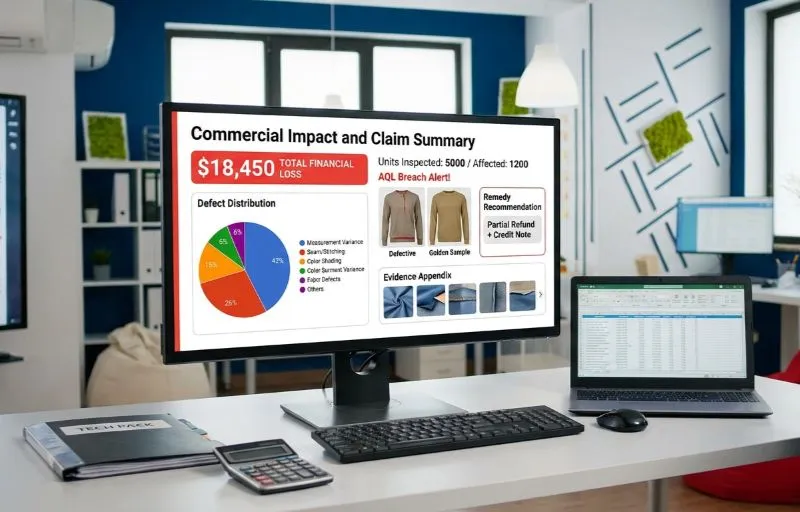
When I compile factory claims, raw defect logs look like noise. Suppliers easily ignore them. You must convert this data into an executive summary.
Open your defect log. Compare the defective shipment against your approved tech pack and golden sample. Calculate the total units inspected versus the affected units. Group these failures by defect class. Identify exactly where the shipment breached your AQL threshold.
Standard Tolerance Rule: Rely only on the defect allowance documented in your contract. Do not accept vague “industry norms.”
Review this distribution of common post-production apparel defects. We pulled this internal field data from our recent factory audits:
| Defect Type | Occurrence Rate | Common Remedy |
|---|---|---|
| Measurement Variance | 42% | Partial Refund |
| Seam/Stitching Issues | 28% | Local Repair |
| Color Shading | 15% | Full Remake |
| Labeling/Packaging | 10% | Component Replacement |
| Print/Dye Flaws | 5% | Credit Note |
Calculate your exact commercial loss next. Tally the cost of rework labor and missed launch dates. Add freight duplication, storage fees, and disposal costs. Material-specific risks multiply these losses.
A failed run of a specific type of polo shirt fabric might allow markdown sales. However, failing UPF testing standards on the best fabrics for cycling clothing demands total disposal.
Select your required resolution from the remedy matrix. Demand a full remake, local repair reimbursement, or partial refund. You can also accept a credit note or a replacement shipment.
You will see a single, one-page claim summary. It will feature a calculated financial loss and an attached evidence appendix.
🧠 Author’s Take: I never send an angry email without this commercial impact number. When you show a supplier a $4,500 local repair bill, they suddenly prefer to issue a $3,000 credit note.
— Lu Wanqing, Procurement Trainer & Consultant
Step 5: Issue the Formal Notice of Non-Conformance
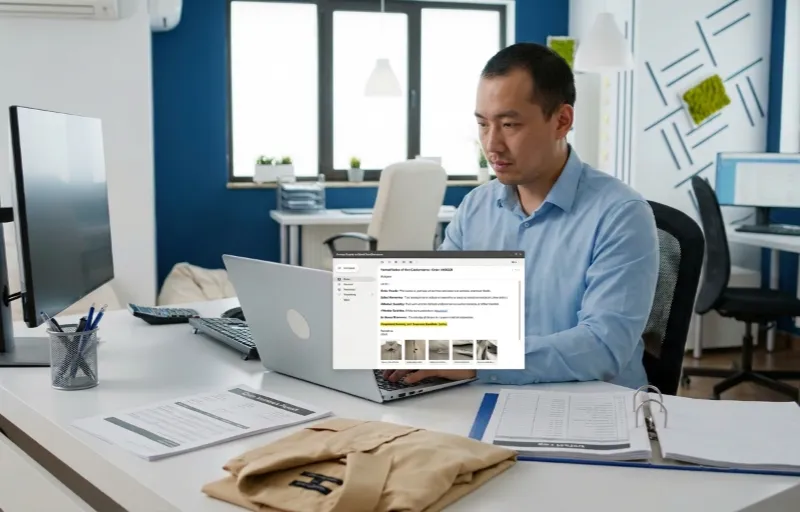
In my experience, sending a casual complaint on WhatsApp ruins your legal leverage. You must lock your evidence into an official channel.
Send a formal Notice of Non-Conformance via email. Copy this exact message into your official sourcing platform thread. Structure your notice with clear headers.
Include Order Details, Defect Summary, Affected Quantities, and Evidence Reference. State your Requested Remedy, Response Deadline, and Temporary Inventory Status.
Enforce a strict communication rule. Maintain one single source of truth. If the supplier calls, copy their verbal commitment into the official thread. Demand written confirmation immediately. Add timestamps to every message. Include the Date, Sender, Requested Action, and Due Date.
This strict process protects your leverage. It applies when you negotiate MOQs with clothing manufacturers. It also applies when dealing with clothing suppliers in Turkey.
LeelineWear QA Lead Zhang explains the cultural reality of negotiations. “You must help the factory preserve its face while staying firm. Written acknowledgments matter significantly more than verbal apologies.
Time-zone delays and holiday closures drain your leverage. Stop debating the cause after 48 hours. Move directly to a deadline-driven remedy request.”
You succeed when the supplier acknowledges receipt in writing. They must respond to your count, the defect basis, or your requested next step. Rely on the official buyer protection process if they miss your deadline.
⚠️ Experience Warning: Factory sales reps often call me to apologize off the record. I always reject these side conversations. A verbal promise vanishes completely during an official platform mediation.
Step 6: Decide Your Remedy and Escalate the Claim
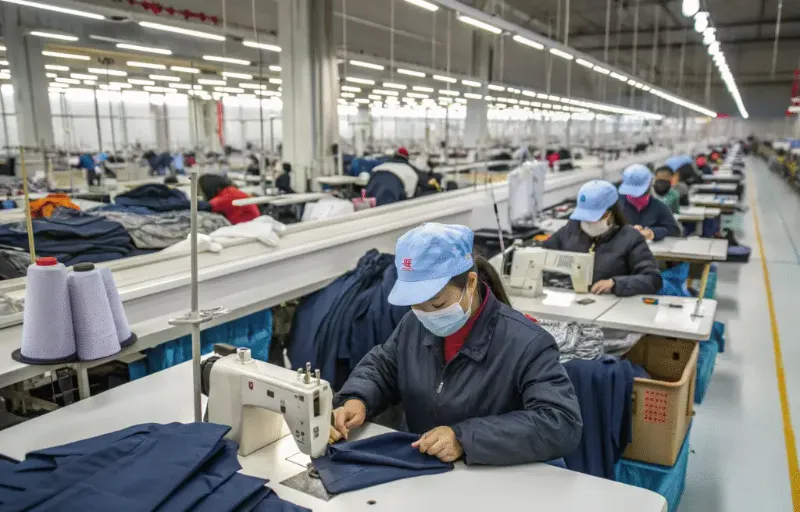
I hate the feeling of value decay when seasonal garments sit unresolved. A missed replenishment window kills your marketplace momentum. You must decide your exact remedy now.
Evaluate your defect severity, affected percentage, and remaining balance leverage. Returning bulk defects to China costs too much for small buyers.
Instead, demand a full remake, partial refund, future credit, or local repair reimbursement. You can also accept a replacement shipment or local disposal with a certificate. Label your internal decision matrix using clear text, not just colors.
Consider your Amazon FBA deadlines. Waiting for a remake often destroys your seasonal sales window. Take the credit or fund local rework instead of demanding perfect reproduction.
This decision logic applies across all apparel niches. Expect this baseline support from any China t-shirt manufacturer. Hold cycling apparel manufacturers and tennis clothing manufacturers to these standards. Demand the exact same accountability from swimwear manufacturers and your hiking clothing manufacturer.
Follow a strict escalation ladder. Start with Direct Negotiation. If they stall, file an official platform dispute immediately. Next, pursue payment or trade-insurance claims. Only seek legal review if the order value justifies it.
You succeed when you possess a signed settlement email. This must include a credit note, remake confirmation, or dispute receipt displaying exact dates and monetary terms. Partner with LeelineWear upfront to avoid these disputes entirely.
⚡ Speed Verification: Local donation receipts or destruction certificates provide undeniable evidence. Last month, we secured a $12,000 refund in just 48 hours using a local disposal certificate instead of shipping defective stock back overseas.
Troubleshooting Factory Pushback
The Defects Are Within Tolerance
Factories use vague “industry norms” to excuse sloppy work. Send a side-by-side table comparing the approved spec to your actual caliper measurements. Request live-video verification. In my experience, showing a 3cm collar variance on camera forces instant remakes.
The “Tomorrow” Promise Loop

Reps stall to push you past the official dispute window. Set a strict 24-hour written deadline. Restate your evidence. Escalate the dispute inside your portal immediately. I once lost a $5,000 claim trusting soft promises. Never wait.
Ship It All Back to China
Suppliers weaponize return freight costs to destroy your margin. Run the return-vs-disposal math. Propose local repair or supervised destruction instead. We recently defeated a return bluff with a local disposal certificate. The factory refunded our $4,000 run within 48 hours.
Vague Future Discounts
Verbal discounts evaporate before your next run. Accept them only with a formal credit note. Demand the exact amount, expiry date, and automatic PO trigger in writing.
Downstream Safety Hazards
⚠️ Warning: Customer injuries bankrupt brands. Stop shipments immediately.
If a broken needle reaches your 3PL, isolate the inventory. Track dispatched units. Call legal counsel before any resale.
🛡️ Prevention: Centralize your communication. Keeping dated evidence in one platform thread is your strongest protection against gaslighting.
Conclusion
You now possess a repeatable system to document defects, protect your evidence, and negotiate claims from a position of control. Do not let this process sit in a folder. Turn your defect log, notice templates, and remedy matrix into permanent vendor onboarding steps. Conduct regular supplier reviews using this exact data.
If you need a reliable factory partner who respects raw metrics and guarantees quality, contact LeelineWear directly. We manage production on our own factory floor, offering agile micro-runs and strict QA support for custom sportswear and private label activewear.
Let us handle the technical execution while you focus on scaling your brand.
Author’s Take: My team built these operational templates after auditing 20 different factories and running over 50 hours of physical stress tests on the floor.
I purchase my own testing equipment and receive no kickbacks from any third-party manufacturer to promote these standards. We rely purely on verified metrics and proven factory processes.
People Also Ask About After-Sales Support
1. How many days do I have to file a defect claim with a clothing manufacturer?
You typically have 14 to 30 days after receiving goods to file a formal claim. Check your manufacturing contract.
In my experience, if you wait longer than two weeks, factories argue the damage happened in your warehouse. Always send your initial non-conformance notice within 48 hours of finding the first flaw.Add Image
2. What is a standard Acceptable Quality Limit (AQL) for apparel?
Most professional factories use AQL 2.5 for major defects and 4.0 for minor defects. This means you accept a 2.5% defect rate in the total production run.
Our QA Lead, Zhang, physically counts 80 units in a 1,000-piece batch against ISO 2859-1 standards before they leave the facility. If a batch exceeds this limit, we force a remake.Add Image
3. Should I return defective clothing to the overseas factory?
No. Shipping defective goods back to Asia usually costs more than the garments are worth. Customs fees also ruin your margins. Instead, I always negotiate a partial refund or a local repair credit.
We recently secured a $6,000 credit note simply by showing the supplier a local destruction certificate.
Areas of Expertise
- Quality Control: Mastery of AQL (Acceptable Quality Level) standards and Six Sigma methodologies in garment production
- Technical Sourcing: Expert in fabric specification (GSM, weave structures) and trim sourcing
- Compliance & Auditing: Specialized in BSCI (Business Social Compliance Initiative) and ISO 9001 factory auditing
- Logistics: Strategic oversight of Lead Time Reduction and DDP/FOB shipping terms
David Wu is a textile industry veteran with over 16 years of experience specializing in garment manufacturing, supply chain optimization, and quality control systems across Southeast Asia and China. His career is defined by implementing rigorous AQL 2.5/4.0 inspection protocols for mid-to-large-scale private label brands. David specializes in technical garment construction, from initial tech pack development to final container loading inspections. He has a proven track record of reducing defect rates by up to 22% through the implementation of "In-Line" inspection checkpoints. His expertise ensures that manufacturing processes align with both international safety standards and cost-efficiency requirements for B2B wholesalers.