How to Build a Sportswear Tech Pack: The Ultimate Manufacturing Blueprint
 David Wu QA Consultant
 Sending a sketch to a manufacturer guarantees a failed sample. To get a functional garment, you need a sportswear tech pack—a manufacturing blueprint that dictates exactly how to cut, sew, and finish high-stretch fabrics.
Custom activewear production is unforgiving. Unlike standard cotton tees, performance gear relies on specific stretch recovery data and specialized construction like ISO 4915 stitch standards. Without these specs, factories guess, and fit fails.
Expect to spend 3–5 hours building your first version. It must be visual and concise enough for non-native English speakers to execute without questions.
What “Nike-style” tech packs do differently Top-tier brands eliminate interpretation. They include strict Bill of Materials (BOM) codes, defined stretch ratios, and exploded construction views. This prevents material substitution and “best guess” sewing.
This guide provides the template and checklist you need to secure accurate quotes and minimize sampling rounds.
What You Need Before You Start
Estimated Time: 2–4 Hours (Data Collection)
How to build a sportswear tech pack, ambiguity is expensive. If a detail is missing, the factory decides for you—usually the cheapest option. Gather these specific inputs to ensure the production line executes your exact vision.
Essential Assets
-
Physical Reference Garment: Required to validate fabric hand-feel, stretch recovery, and construction methods. A physical sample is superior to a photo.
-
Vector Source Files: .AI or .EPS files. Raster images (JPEGs) result in pixelated prints.
-
Fit Intent Statement: Define the physical sensation (e.g., “High Compression/Sculpt” vs. “Naked Feel”). This dictates the GSM and spandex content we select.
-
Label Copy: Draft care instructions, fiber content percentages, and Country of Origin (COO) placeholders.
Software & Workflow
-
Technical Flats: Use Adobe Illustrator (recommended) for scalable vector sketches and callouts.
-
BOM & Specs: Use Google Sheets or Excel.
-
Communication Protocol: When annotating sketches, use text labels rather than colors (e.g., “See Arrow A,” not “See red line”) to ensure clarity on black-and-white factory printouts.
-
Sign-Off Authority: Designate one person to approve the Pre-Production (PP) sample to avoid conflicting feedback.
⚠️ Compliance Warning: Sportswear finishes (wicking, anti-microbial) are chemically intensive. Verify safety standards for your target market, such as CPSIA (US) or REACH (EU). [Link to an Official Textile/Labeling/Testing Standard or Government Import Guidance relevant to the target market]
🚀 Actionable Insight: Download the [Activewear Tech Pack PDF Checklist (BOM + Spec + Packaging)] to ensure no data point is missed. Ready to sample? Contact our team for a material consultation.
Step 1: Build the Control Panel (Title Page)
Treat the first page as a binding engineering document. This Control Panel ensures the production manager validates the scope before reviewing a single stitch.
-
Configure the Header Create a table with these specific fields to secure the document’s identity:
-
Style Name & SKU: (e.g., Apex Runner V2 – W-LEG-002)
-
Season & Market: (e.g., SS25 / Women’s High-Impact)
-
Size Range: List the full run (e.g., XS–XXL) and explicitly mark the Base Size (e.g., Medium) for fit approvals.
-
-
Initialize Version Control Insert a Revision History Log immediately below the header. Include columns for Version, Date, Change Notes, and Author. You must log every specific adjustment here (e.g., “V2: Changed flatlock SPI from 10 to 12”).
-
Define Ownership Add a Contact Block for the primary technical lead and a standard Confidentiality/IP Notice.
-
Verify Integrity Export the file as a PDF. Open it in Adobe Acrobat Reader on a secondary device and zoom to 200%. Ensure lines remain crisp and text is selectable. If pixelation occurs, the factory will misread dimensions on printed copies.
Note: If using PLM software, map these fields to the global Style Header module.
⚠️ Safety First: Never name files “Final.pdf.” Enforce a strict naming convention to prevent manufacturing errors: Brand_Style_Version_Date (e.g., LWEAR_LG002_V1_0512.pdf).
Step 2: Draw the Technical Flats
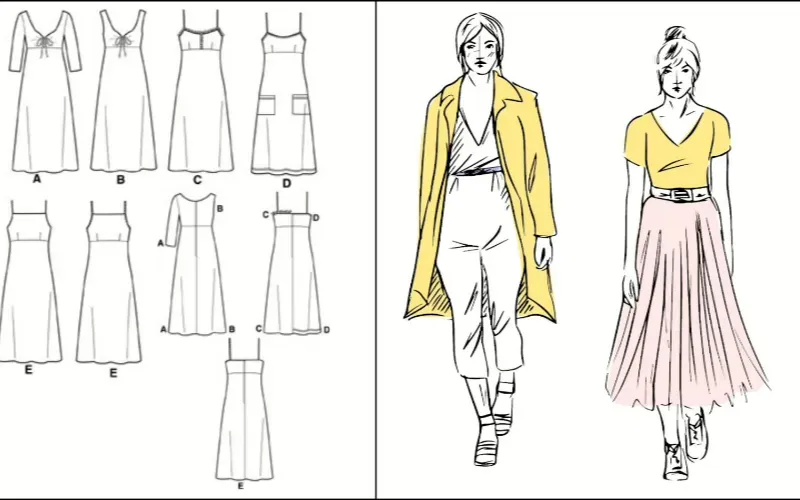
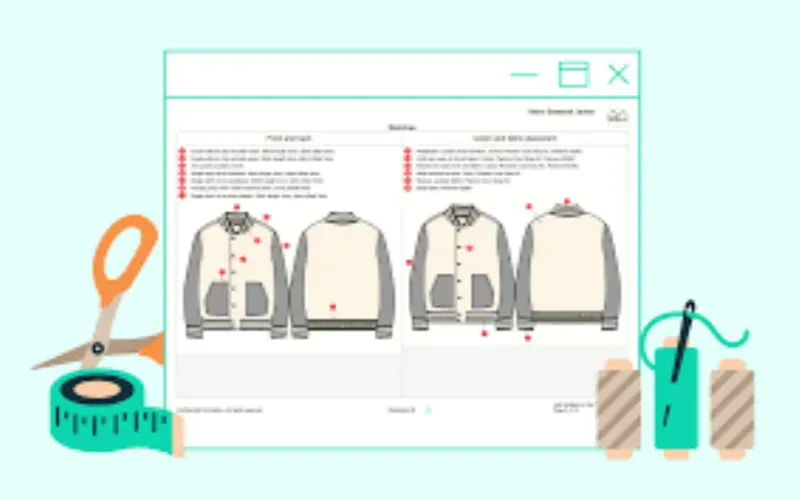
Your technical sketches (“flats”) are functional assembly instructions, not fashion illustrations. You must provide Front and Back views, adding a Side view if the design features lateral paneling or cargo pockets.
-
Draft the Vector Shell Use professional software like Adobe Illustrator or CorelDRAW. While high-DPI hand sketches are acceptable for early prototyping, vector flats ensure sharp, scalable lines that prevent “fuzzy edge” interpretation errors during bulk manufacturing. Define the silhouette with a heavy line weight (2pt) and use lighter strokes (0.5pt) for internal stitch lines and panel seams.
-
Isolate Construction Mechanics Do not force the factory to guess how components function. Create enlarged Detail Views for critical areas:
-
Waistband: Internal elastic width and drawstring exit placement.
-
Gusset: Specific diamond vs. triangle shapes for mobility.
-
Trims: Zipper garages, bonded tape locations, and strap attachments.
-
-
Label Seams & Stitches Map every join with numbered callouts that correspond to your spec sheet. Ensure callout arrows do not cross chaotically. To guarantee accessibility across time zones and printers, avoid color-coding (e.g., “the red line”). Instead, label seam types directly with text abbreviations: FL (Flatlock), CS (Coverstitch), or DN (Double Needle).
⚡ Power Move: Perform the “A4 Print Test.” Print your page at 100% scale. If a project manager cannot distinguish between a seam line and a topstitch without squinting, increase your line spacing and stroke weight immediately.
Step 3: Create the Garment Construction Sheet
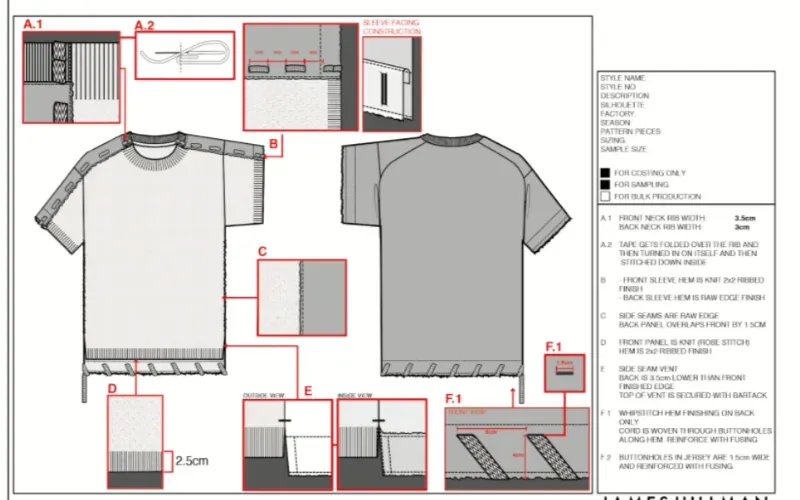
Activewear fails at the seams. You must translate visual designs into explicit assembly logic to prevent bursting during squats or chafing during runs. Start with our types of garment seams guide to match each zone with the right construction.
-
Map Seam Anatomy: Create a specification table with columns for Zone, ISO Seam Class, Seam Allowance, and Stitch Density.
-
High-Friction (Inseam/Armpit): Specify Flatlock (ISO 607). This creates a butt-joint with no bulk to eliminate chafing.
-
Structural: Use 4-Thread Overlock (ISO 514) for internal seams requiring moderate stretch. For the full seam-zone decision, read our Overlock vs. Flatlock guide.
-
Finishing: Select Coverstitch or Bonding for hems and waistbands.
-
-
Define Stitch Density (SPI): Set a target of 12–14 SPI (Stitches Per Inch) for compression gear. High density ensures the thread expands with the Spandex/Lycra without snapping.
-
Mandate Reinforcement: Mark Bar-tacks at high-stress anchors, specifically pocket corners, strap attachments, and drawstring exits.
-
Standardize the Legend: Include a Construction Key (e.g., FL = Flatlock, CS = Coverstitch) so sewing operators do not guess.
Verification: The Sensory & Stress Test
-
Check Comfort: Rub your thumb firmly over the inseam. A proper flatlock should feel flush against the skin with zero ridges.
-
Check Durability: Stretch the seam to its limit. If you see “grinning” (threads showing gaps between panels) or hear popping, reject the sample.
⚡ Power Move: Not every factory owns ultrasonic bonding machinery. Always specify an “Approved Substitution” (e.g., “Substitute Bonding with Clean Finish Coverstitch”) to prevent production stalls.
Step 4: Construct the Bill of Materials (BOM)
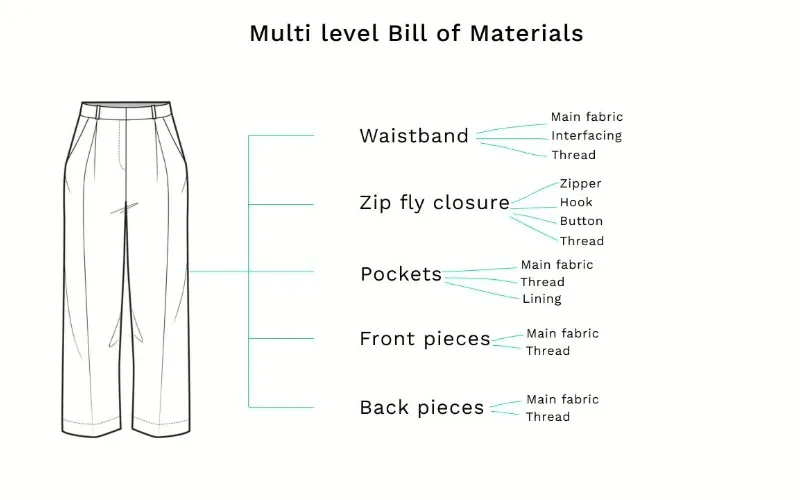
The BOM acts as your production contract. It locks in costs and defines quality standards. If a component is not explicitly listed here, the factory may substitute it with cheaper surplus stock to widen their margins.
-
Define Component Specifications Create a comprehensive table listing every physical ingredient. Eliminate ambiguity with precise technical data:
-
Main Fabric: Specify fiber ratio, knit structure, weight, and finish (e.g., 80% Nylon 6.6 / 20% Spandex, 220 GSM, Interlock, Wicking).
-
Sensory Standard: Add a “Hand-Feel” column. Use descriptors like “Buttery/Brushed” or “Slick/Cool” to prevent texture mismatches.
-
Hardware: List specific brands and gauges (e.g., YKK #3 Invisible Zipper). Refer to Pantone Connect for exact color codes on thread and trims.
-
Enforce the Compliance Policy ⚠️ Critical: Insert this text in bold red at the top of your sheet: “Material substitutions require written approval before sampling or bulk.” This clause prevents “bait-and-switch” tactics where factories swap premium fibers for generic polyester blends.
-
Cross-Reference Callouts Verify that every numbered callout on your technical flats maps to a specific BOM line item. Ensure invisible components like stabilizers, interfacing, and pocket linings are accounted for.
-
Set Performance Targets If you do not have a nominated supplier, define the required outcome rather than the source.
-
Constraint: “Factory to source. Must pass Grade 4 Anti-Pilling and meet OEKO-TEX Standard 100 requirements.”
5. Define Fabric Performance & Sourcing
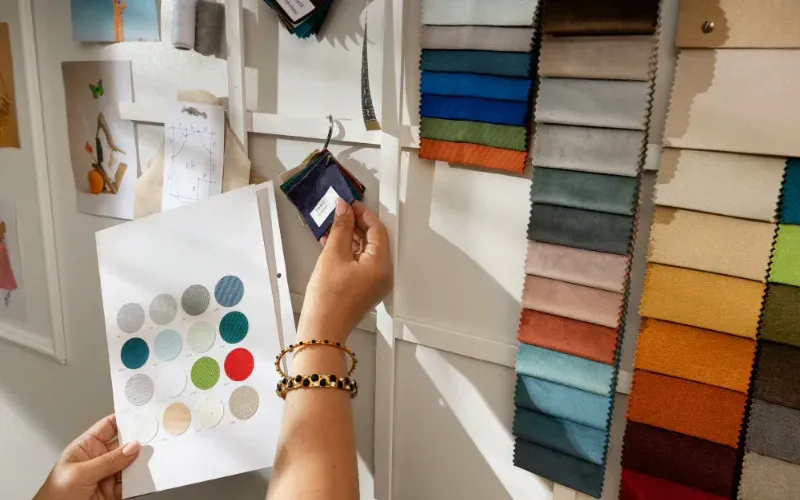
Fiber percentages alone (e.g., “80% Nylon”) do not guarantee quality. You must add a Performance Block to your BOM to quantify exactly how the material behaves under stress.
-
Set measurable targets Define non-negotiable metrics in your “Fabrication Requirements” column:
-
Recovery: Specify “>90% recovery within 1 minute” to ensure leggings do not “bag out” at the knees or seat.
-
Opacity: Mandate a Squat-Proof standard (zero sheer visibility at 40% stretch in high light).
-
Durability: Set limits for Pilling (Min Grade 3.5) and Shrinkage (Max 5% post-wash).
-
-
Dictate the sourcing workflow
-
Nominated Mill: Provide the specific supplier name and article code to control the input.
-
Factory Sourced: Require Lab Dips (for color accuracy) and Quality Swatches (for hand-feel) before authorizing bulk production. Record specific lot numbers on the tech pack to prevent future bait-and-switch tactics.
-
-
Verify the physical sample Perform a sensory check when the swatch arrives. Stretch the fabric to its limit and release it. It must snap back instantly without rippling. Run your hand over the surface to confirm it feels cool-to-touch (if nylon) or soft (if brushed poly).
[Image: Performance Spec block showing columns for “Test Method,” “Target Value,” and “Tolerance,” alongside a fabric stretch test.]
🧠 Expert Take: Reference official standards like AATCC 197 for wicking validation. This forces the factory to rely on objective lab data rather than subjective opinions.
Step 6: Build the Measurement & Grading Sheet
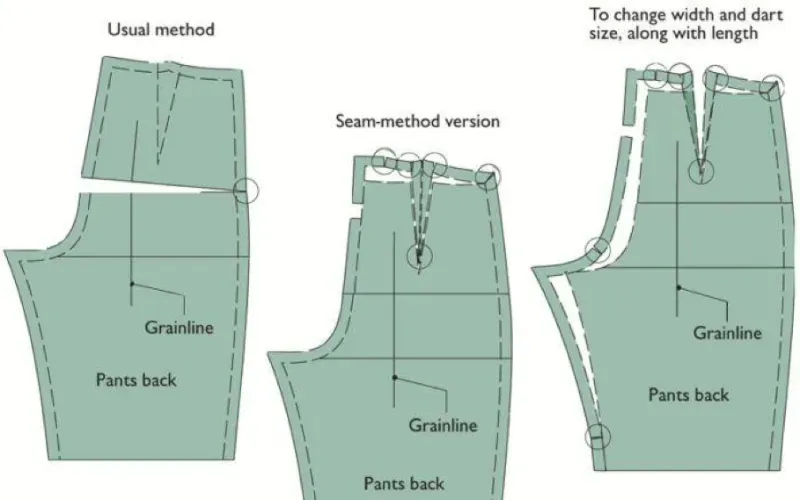
To prevent fit drift, you must translate subjective sizing into measurable data that controls dimensions both at rest and extended.
-
Map Points of Measure (POM) Overlay measurement arrows on your technical flat. Label every point with a code (e.g., POM-01 Waist Width) instead of relying on visuals alone. This creates a language-agnostic reference for factory teams.
-
Calculate Grade Rules (Technologist Review) Sportswear does not grade linearly. Apply Negative Ease logic for high-stretch fabrics like spandex blends.
-
Define increments: Set smaller grade jumps for high-compression zones to maintain support across sizes.
-
Localize sizing: Create a conversion column (e.g., US M / EU 38) to clarify labeling for international markets.
-
Set QC Tolerances Assign an acceptable margin of error to every measurement. Mark compression areas as Critical POMs with strict tolerances (e.g., +/- 0.5cm). If the factory misses this range, the garment fails QC.
-
Verify the Data
-
Double-Blind Check: Have two people measure the sample using your guide. If numbers differ, clarify the POM definition.
-
Sensory Check: Wear the sample. Ensure the waistband does not roll and leg openings do not pinch.
⚠️ Safety First: Consult ASTM D5585 (Standard Tables for Adult Female Figures) as your baseline, then reduce measurements based on your fabric’s stretch modulus.
Step 7: Create the Colorways & Artwork Page
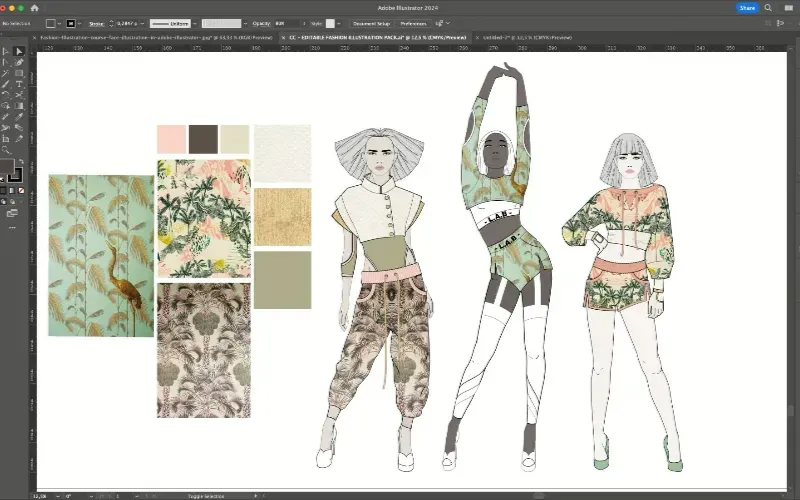
Color discrepancies and placement errors are frequent failure points. You must map every visual element to a measurable standard using specific file formats and coordinates.
-
Define Color Codes Generate updated flats for every color variant. Create a Color Schedule that assigns a specific Pantone (TCX) code to each fabric zone. Never use generic terms like “Navy”; specify 19-4029 TCX to ensure the lab dip matches your standard. Consult the official Pantone Connect database for accurate references.
-
Specify Artwork Assets Provide a cloud link to master files rather than embedding them in the PDF to prevent compression issues.
-
Logos/Embroidery: Use Vector (.AI/EPS) files for infinite scalability.
-
Sublimation: Use 300 DPI raster files at actual print size.
-
Dimensions: Specify exact width and height (e.g., 55mm x 20mm), never “scale to fit.”
-
-
Dictate Placement Coordinates Do not rely on visual arrows. Use numeric measurements to ensure accessible, precise execution:
-
Method A (Seam Relative): Measure from fixed anchors, such as 15cm down from High Point Shoulder (HPS).
-
Method B (Edge Relative): Measure from the garment edge (e.g., 5cm up from Cuff).
-
[Image: A colorway page showing three jersey variants. A callout highlights the chest logo with dual measurement lines: one measuring distance from the neck seam and one from the center front.]
Verification: The Strike-Off Include a mandatory note in your tech pack: “Strike-off / Print Proof Required for Approval.”
⚡ Power Move: Perform a sensory check on the physical proof. Verify that logo edges are sharp (no jagged pixels), alignment is consistent left-to-right, and reflective films are fully bonded without lifting corners.
Step 8: Define Operations, QC, and Revisions
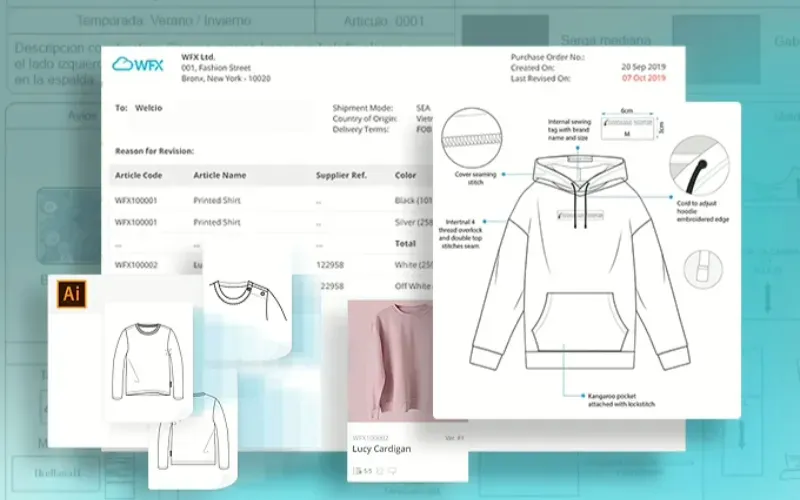
A sportswear tech pack must dictate how the product behaves on the production line and in the warehouse. Without explicit operations data, you risk receiving non-compliant inventory that gets rejected by fulfillment centers.
1. Finalize Operations & Packaging
Create an Operations Page to standardize logistics and the unboxing experience.
-
Packaging: Specify Folding Methods (e.g., quarter fold) and Polybag requirements (thickness, suffocation warnings). For DDP services, mandate scannable UPC Barcodes on the exterior to enable direct-to-warehouse shipping.
-
Labeling: Designate exact placement for Care Labels (Country of Origin, Fiber Content) and heat-transfer Size Tags.
2. Set AQL Quality Standards
Subjective requests fail. Reference AQL 2.5 and ISO 2859-1 to establish mathematical pass/fail rates. Define defect categories in your spec:
-
Critical: Safety hazards (broken needles, mold). Zero tolerance.
-
Major: Functional failures (broken zippers, measurements exceeding tolerance).
-
Minor: Cosmetic flaws (untrimmed threads, slight shading).
3. Execution: Testing & Revisions
Trigger third-party lab tests for Colorfastness (Rub Test) and Shrinkage before bulk fabric is cut. Manage sample rounds with a Revision Matrix:
-
Photo & Mark: Circle defects digitally on the image.
-
Command: Use imperatives (e.g., “Reduce waistband width by 1.5cm”).
-
Sign-Off: Require a signed Pre-Production (PP) Sample before mass manufacturing begins.
⚡ Power Move: Perform a Sensory Check. Stretch seams to ensure no popping threads (tension check) and verify bonded seams lay flat without bubbling or scratching the skin.
🚀 Actionable Insight: Ready to convert your tech pack into inventory?
-
Start Manufacturing: LeelineWear
-
Request a Quote:
Troubleshooting Common Failures
90% of manufacturing failures stem from ambiguity in the sportswear tech pack. When specifications are vague, factories guess to save costs. Use this guide to diagnose and resolve the most frequent production deviations.
Problem: Factory Switched Materials or Trim
-
Why: The BOM lacked specific vendor codes or explicit substitution rules.
-
Fix: Immediately reject the sample. Require a physical swatch and lab dip for approval. Verify fabric weight against ASTM D3776 standards.
-
Prevent: Update the BOM with a bold clause: “No material substitution without written approval.” Do not authorize bulk without a signed Pre-Production (PP) sample.
Problem: Measurements Don’t Match (Size M fits like S)
-
Why: The factory measured the garment differently than you (e.g., “relaxed” vs. “extended”).
-
Fix: Add explicit POM (Point of Measure) diagrams to the tech pack. Specify the method (e.g., “Measure laid flat, 1 inch below armhole”).
-
Prevent: Mark critical fit zones with a red flag icon in the measurement chart.
Problem: Seams Pop or Chafe in Stretch Zones
-
Why: Incorrect stitch type used for high-compression fabric.
-
Fix: Specify the exact seam class, such as ISO 607 (Flatlock). Refer to ISO 4915 stitch classifications to ensure thread elasticity matches the fabric.
-
Prevent: Mandate a Stretch Test in the sampling checklist.
Problem: Artwork Placement Drifts Between Sizes
-
Why: Logo placement was estimated visually rather than mathematically.
-
Fix: Define placement using measured reference points (e.g., “Center logo 15cm down from neckline”) and apply grading rules for size scaling.
Problem: Packaging Rejected by 3PL/Warehouse
-
Why: Missing barcodes, incorrect polybag warnings, or non-compliant carton dimensions.
-
Fix: Add a dedicated Packaging Page with explicit label placement diagrams and carton weight limits.
🛡️ Prevention: The “Golden Sample” Rule Never discard your approved sample. Sign and date the actual garment with a permanent marker and return it to the factory. This “Golden Sample” becomes the binding legal standard for bulk production.
When to Escalate
If a specific deviation occurs twice, pause the project. Do not proceed to bulk. Re-confirm the factory is working from the current tech pack version and request a video call to review the specific page.
💡 Diagnostic: Trace every seam line with your finger. If the physical seam does not match the diagram, or if you feel a ridge where it should be flat, it is a functional failure. Reject it.
People Also Ask About Build A Sportswear Tech Pack
What is the difference between a spec sheet and a full tech pack?
A spec sheet is a single component that lists garment measurements and grading rules. A sportswear tech pack is the complete manufacturing blueprint that includes the spec sheet, plus the Bill of Materials (BOM), construction callouts, artwork placement, and packaging standards.
Sending a spec sheet alone forces the factory to guess on fabric weight, stitching methods, and trim quality, often resulting in a “cheap” feeling sample.
How long does it take to create a professional tech pack?
Expect to invest 3–5 hours per style for a comprehensive document if you have your assets ready. This includes drafting vector flats, sourcing BOM codes, and calculating grade rules.
While time-intensive, a detailed tech pack reduces the sampling phase from an average of 4 rounds down to 1–2 rounds, saving weeks of production time and hundreds of dollars in courier fees.
Do I need Adobe Illustrator to make a tech pack?
Yes, for the technical flats. While you can compile the data in Excel or Google Sheets, the visual diagrams must be vector-based (.AI or .EPS). Vector lines remain sharp when zoomed in or printed on large factory plotters.
Raster images (JPEGs/PNGs) pixelate when resized, causing sewing operators to misinterpret stitch lines and seam placement.
Does a tech pack protect my designs from being copied?
No. A tech pack is an instruction manual, not a legal shield. To protect your intellectual property, you should have the manufacturer sign an NNN Agreement (Non-Disclosure, Non-Use, Non-Circumvention) before sharing the file. For unique functional innovations, consider filing for a patent.
For general branding, register your trademark with the USPTO or your local IP office.
Conclusion
If you have followed every step, your sportswear tech pack is no longer just a concept—it is a manufacturing asset. You now possess a finalized stack: Cover Page, Technical Flats, Construction Logic, BOM, Fabric Performance, Grading Rules, Artwork Coordinates, and Packaging/QC protocols.
Execute the following sequence to move into production:
-
Export & Append: Save your document as a single, high-resolution PDF. Attach source files (vectors/logos) separately.
-
Request Quotes: Send the pack to 2–3 manufacturers. Compare unit costs and lead times.
-
Start the Loop: Order Sample #1 → Issue Revision Brief → Order Sample #2 → Approve PP Sample.
Before you hit “send,” verify your work against the downloadable checklist to ensure zero data gaps.
-
Start Manufacturing: LeelineWear
-
Request a Quote:
Final Sensory Check: Your tech pack should read like a recipe. If a step is missing, the chef guesses. If the recipe is precise, the result is consistent every time. Do not let the factory guess.
Related reading: Deciding whether the pack is even necessary? See OEM vs ODM for sportswear for which model requires a full tech pack, and which one runs on the factory’s own spec.
Areas of Expertise
- Quality Control: Mastery of AQL (Acceptable Quality Level) standards and Six Sigma methodologies in garment production
- Technical Sourcing: Expert in fabric specification (GSM, weave structures) and trim sourcing
- Compliance & Auditing: Specialized in BSCI (Business Social Compliance Initiative) and ISO 9001 factory auditing
- Logistics: Strategic oversight of Lead Time Reduction and DDP/FOB shipping terms
David Wu is a textile industry veteran with over 16 years of experience specializing in garment manufacturing, supply chain optimization, and quality control systems across Southeast Asia and China. His career is defined by implementing rigorous AQL 2.5/4.0 inspection protocols for mid-to-large-scale private label brands. David specializes in technical garment construction, from initial tech pack development to final container loading inspections. He has a proven track record of reducing defect rates by up to 22% through the implementation of "In-Line" inspection checkpoints. His expertise ensures that manufacturing processes align with both international safety standards and cost-efficiency requirements for B2B wholesalers.