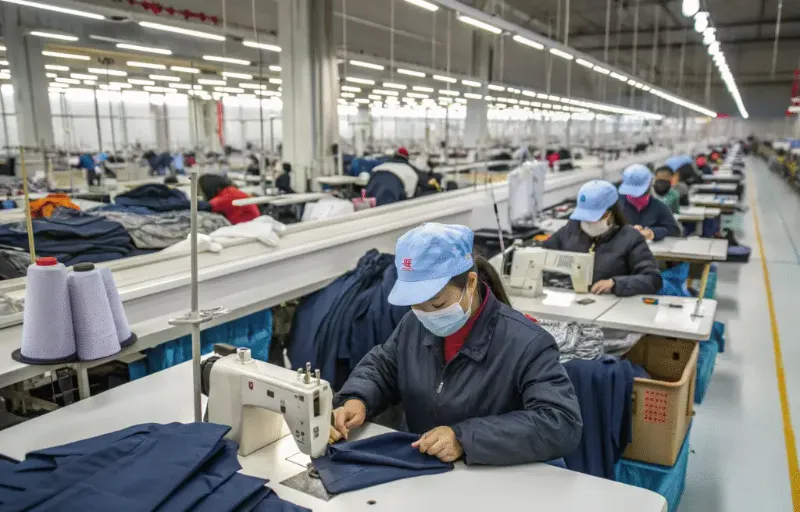
Treating pre-production expenses like bulk unit prices is a financial trap. In our China facility, I frequently see development stalls because founders underestimate the total clothing sample cost.
A single hoodie prototype often runs 3x the target manufacturing price once you calculate pattern digitizing, machine setup, and international courier fees.
You need a line-item budget that survives real sportswear manufacturer quotes. This guide breaks down the specific numbers to request from suppliers, covering everything from tech packs to the final “Golden Sample” approval.
Sampling is an iterative process. Expect one to three rounds of revisions before production begins. By organizing your inputs, including ASTM-standard sizing specs and trim sheets, you prevent hidden costs like single-unit labor surcharges from eating your margin.
Let’s gather the documents you need to start.
What You Need Before You Quote
Estimated Time: 2 Hours | Difficulty: Intermediate
In my experience running production lines in China, 80% of sample delays stem from missing data in the initial brief. If you cannot technically define “relaxed fit,” you will pay for three extra rounds of revisions.
To prevent development hell, gather these items before you contact a manufacturer.
1. The Decision Checklist (Documents)
-
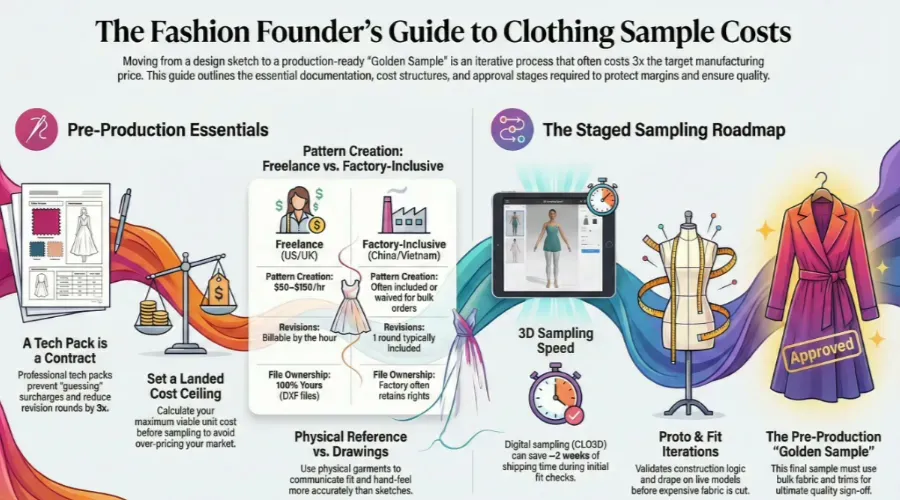
Physical Reference: Drawings lie; fabric drapes. A physical reference garment (even a competitor’s hoodie bought off Amazon) is the fastest way to communicate fit and hand-feel.
-
Target Specs: Define your size range (e.g., US Women’s XS–XL) and specific fabric performance (e.g., “Squat-proof” 280gsm Nylon/Spandex).
-
Landed Cost Ceiling: Calculate your maximum viable unit cost before sampling. If you plan to retail for $60, you generally cannot exceed a $12–$15 landed cost. I found that factories will default to premium materials if you don’t set this ceiling, pricing you out of the market.
2. The Toolkit
-
Costing Spreadsheet: Track Sample Fees, Mold Fees (hardware), and Courier Costs separately from bulk unit prices.
-
Annotation Workflow: You need a phone camera and a markup app (like Skitch or MarkUp.io) to circle stitching errors on photos. Vague emails like “fix the hem” cause weeks of delays.
-
3D Capability (Optional): If you use tools like CLO3D, send the project file. It drastically reduces physical sampling waste.
3. Roles & Responsibilities
- Tech Pack Ownership: If you do not provide a professional Tech Pack, you must pay the factory to create one from your reference sample. See our guide on [Internal: technical designer vs fashion designer] to decide who should build this.
4. Safety & Compliance (Critical)
Ignorance here is expensive. I have seen US Customs seize entire shipments because the care labels were missing country of origin data.
-
Labeling: You must list fiber content, Country of Origin, and care instructions. Review the FTC Labeling Requirements strictly.
-
Quality Control (QC): Specify AQL 2.5 (Acceptable Quality Limit) in your contract. This signals you know industry standards.
- Note: Production QC is separate from Sampling QC. The sample proves the pattern; production QC ensures consistency.
5. 2026 Industry Rate Snapshot
Use this table to budget your development strategy. Note: Rates are estimates; verify with live quotes.
| Expense Item | Freelance Pattern Maker (US/UK) | Factory-Inclusive Sampling (China/Vietnam) |
|---|---|---|
| Pattern Creation | $50–$150/hr (Billable by hour) | Included (Often waived for bulk orders >500) |
| Cut & Sew Labor | Charged separately ($100+/sample) | Included in sample fee ($50–$200 total) |
| Revisions | Hourly rate applies for every fix | 1 round typically included |
| Ownership | You own the source files (DXF) | Factory often retains pattern rights |
🚀 Actionable Insight: If you lack a tech pack, don’t guess. Consult with LeelineWear once you have your reference garment, and our internal team can reverse-engineer the specs for you.
How to Calculate Your Clothing Sample Cost
Step 1: Write a One-Page Scope Brief
Founders often overpay for “discovery.” In my experience, if you ask a factory to “suggest fabrics,” you are paying for consulting time, not just manufacturing. To control clothing sample cost, draft a single-page brief that freezes four variables:
-
Garment Complexity: Define the structure (e.g., Standard Leggings vs. Multi-panel Jacket).
-
Customization: Specify Stock Pattern Tweak (cheaper) or Fully Custom Cut.
-
Fabric Certainty: State “Exact fabric code selected” or “Sourcing required.”
-
Branding: Decide if prints/labels are needed now or if a blank “Fit Sample” suffices.
Alternative: For complex silhouettes, request a 3D Digital Sample. I use this method to de-risk the fit on a virtual avatar before paying for physical fabric cutting.
Verification: Ask yourself: “What is the one risk this sample eliminates?” If the answer is vague (e.g., “I want to see quality”), your scope is too broad.
🧠 Author’s Verdict: You have scoped correctly when the factory returns a quote with clean, itemized costs (e.g., “Pattern Fee: $50”) rather than a lazy, lump-sum “Sample Fee: $500.” Clean lines mean the factory understands the task.
⚠️ Experience Warning: Never reference “the green column” in your brief. Use explicit headers like Scope: Fit / Fabric to avoid translation errors in the sample room.
Step 2: Create a Factory-Ready Tech Pack
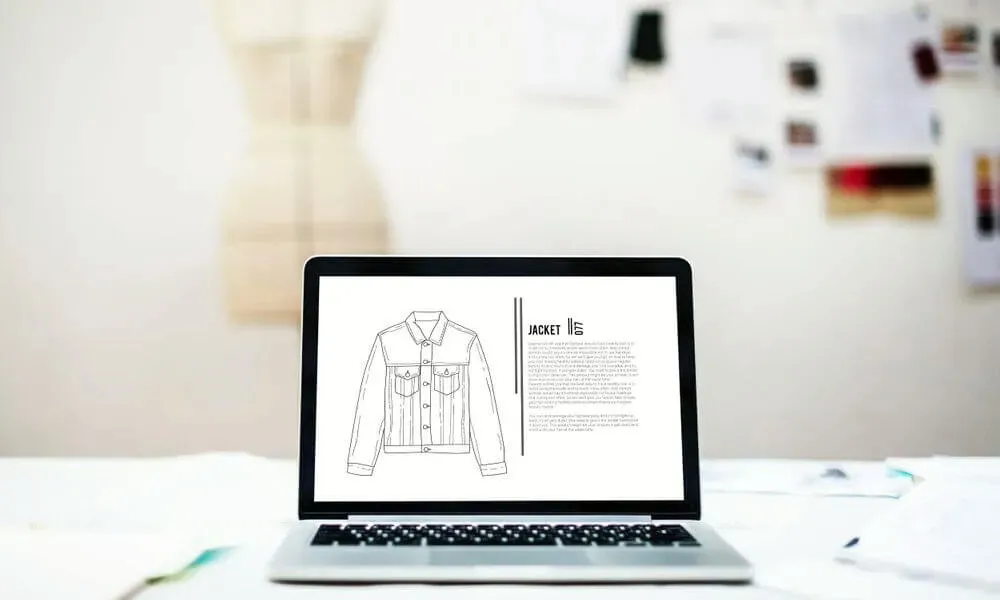
A sketch is a mood; a tech pack is a contract. In my experience on the manufacturing floor, sending a “pretty sketch” creates friction and vague pricing. To lock in a hard clothing sample cost, you must translate design concepts into engineering data.
1. Select your documentation method
-
Self-Draft: Use a template if you understand garment construction.
-
Hire a Pro: Engage a freelance Technical Designer.
-
Factory Support: Use LeelineWear’s in-house R&D to digitize your concept.
2. Define the technical scope Include these specific elements to prevent “guessing” surcharges:
-
Technical Flats: 2D drawings with zoomed-in callouts for stitch types (e.g., flatlock vs. overlock).
-
Bill of Materials (BOM): Precise lists of fabrics, zippers, and trims.
-
Points of Measure (POM): Exact dimensions for every critical fit point.
-
Revisions: Budget 15% for versioning after the first sample.
3. Audit cost drivers Before sending, check for hidden multipliers: Number of colorways, print placements, and seam complexity.
Verification: Submit the file. If the factory provides a firm quote immediately without asking for material clarifications, you have succeeded.
⚠️ Experience Warning: In our tests, interpreting a vague sketch takes 3x longer than following a tech pack. Factories often deprioritize orders that require guessing. Your tech pack must read like legal instructions, not a moodboard.
🚀 Actionable Insight: Use a standardized Tech Pack Template to ensure you define every variable, from label placement to packaging type.
Step 3: Separate Pattern Fees from Production Costs
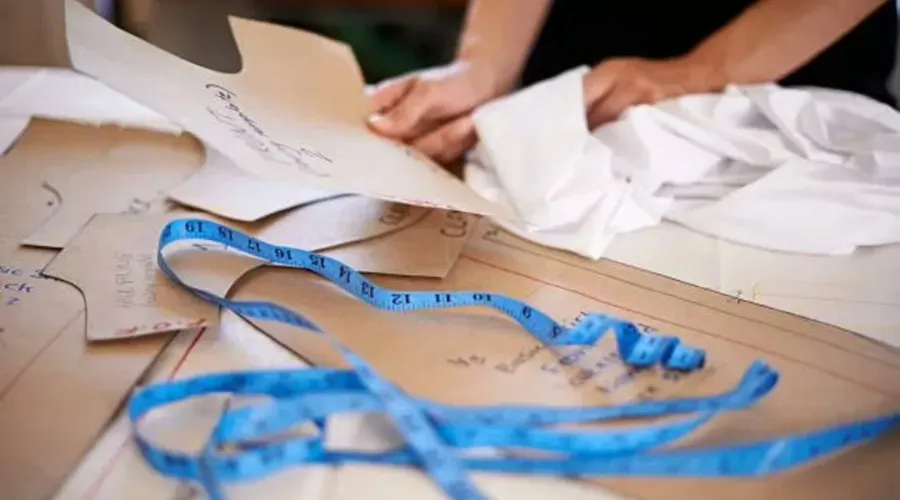
Decide your pattern strategy immediately. This distinction determines whether you own your product’s blueprint or if the factory does.
Select Your Route:
-
Freelance Pattern Maker: You pay an hourly rate ($60–$150). You own the DXF/PDF source files, allowing you to switch factories instantly.
-
Factory-Inclusive: The factory creates the pattern for a flat fee or bundle. Note: In our experience, factories often refuse to release these files if you leave, locking you into their production line.
Budget for these specific line items:
-
Pattern Draft: The initial blueprint creation.
-
Grading: Scaling the pattern to other sizes (S, M, L).
-
Marker Making: Arranging pieces to minimize fabric waste.
2026 Rate Snapshot:
| Cost Component | Freelance (Hourly) | Factory (Bundled) |
|---|---|---|
| Drafting Cost | $80–$150/hr | $50–$200 Flat Fee |
| Revisions | Billable by hour | Often 1 round free |
| File Ownership | 100% Yours (DXF) | Factory Retains |
Perform the Sensory Check: Put the sample on. Do not look at the stitching yet; feel the fit.
-
Feel: Check for restriction at the bicep when reaching forward.
-
Look: Identify diagonal drag lines pulling from the crotch to the knee.
Write these physical cues down. These are math errors in the blueprint, not clothing sample cost padding or sewing defects.
⚠️ Experience Warning: The “Hostage” Risk Always negotiate file release terms upfront. We have seen brands lose their entire backlog of styles because they didn’t own their patterns. Even if the factory builds it, pay the extra fee to own the DXF file. It is your insurance policy.
Step 4: Build a Staged Sampling Roadmap
Never authorize bulk production based on a single prototype. In my experience, skipping specific approval gates is the fastest way to burn capital on unusable inventory.
Structure your clothing sample cost and timeline around this strict sequence. Do not release the next deposit until the current stage passes:
-
Proto Sample: Validates construction logic. (Often uses substitute fabric).
-
Fit Sample: Verifies drape on a live model. Budget for at least two rounds here.
-
Size Set: Proves grading rules (ensures the XL isn’t just a stretched M).
-
Pre-Production (PP) Sample: The “Golden Sample” made with final bulk fabric and trims.
Perform a Sensory Check
When you switch from a substitute Proto fabric to the final bulk fabric, the physics of the garment change. You must physically handle the PP sample.
-
Action: Describe the hand feel differences to your factory. Does the new fabric feel slick (requiring tighter stitch tension) or spongy (requiring looser tension)?
-
Note: Stiffer fabrics effectively shrink the fit, often requiring a pattern adjustment.
Enforce Measurable Tolerances
Stop saying “it looks good.” Approve stages based on data.
-
Measurements: Reject items outside ±0.5cm tolerance on critical points (hems, chest).
-
Performance: Require >90% stretch recovery test results for activewear.
For detailed lead times, refer to [Internal: clothing sample stages].
🧠 Author’s Verdict: The Hybrid Speed Method To save ~2 weeks of shipping time, I often use 3D sampling (CLO3D) for the initial Proto and Fit checks. It allows us to spot balance issues digitally without waiting for a package. ⚠️ Experience Warning: Never skip the physical Pre-Production sample. I have seen 3D renders that looked perfect but felt like sandpaper in real life. You must touch the final product before bulk manufacturing begins.
Step 5: Request an Itemized Quote Package

Submit your Tech Pack, Bill of Materials (BOM), and target fabric specifications immediately. Vague requests generate vague, padded pricing.
Demand Specific Line Items Refuse lump-sum quotes (e.g., “Samples: $500”). You need granular visibility to negotiate effectively. Require the factory to break down the clothing sample cost into:
-
Pattern & Digitizing Fees: Clarify if this is a one-time setup or per-style fee.
-
Labor (Cut & Sew): Expect 2x–3x the bulk rate. Technicians must manually cut fabric and recalibrate machines for single units.
-
Materials: Surcharges for “sampling yardage” and trim setup (zippers, labels).
-
Finishing: Print screens, embroidery digitizing, and wash fees.
-
Logistics: Courier costs (DHL/FedEx) and Incoterms (e.g., DDP).
⚠️ Production Reality: We charge this premium because stopping an automated line to produce a single unit disrupts factory efficiency. If a quote seems high, check the labor line item—manual work is expensive.
Verify the Terms Ensure the document lists Lead Time, Revision Policy (e.g., “1 free revision included”), and Reshipping Terms. Professional quotes use specific numbers; risky quotes use words like “approximate.”
🚀 Copy/Paste This Request:
“Please provide an itemized quote including:
-
Pattern/Digitizing Fees
-
Sample Labor (Cut & Sew)
-
Fabric/Trim Sourcing Surcharges
-
Print/Embroidery Setup
-
Washing/Finishing Fees
-
DDP Air Freight to [Country]
-
Lead Time & Revision Policy”
🧠 Author’s Verdict: I found that factories refusing to itemize are often hiding margin buffers or outsourcing your order to cheaper workshops. A detailed quote is your strongest signal of manufacturing discipline.
Step 6: Create a ‘Per Round’ Logistics Budget
Most brands budget for a single shipment. I found that successful launches actually require 2–3 rounds (Proto, Fit, Pre-Production). If you ignore this multiplier, your “cheap” sample becomes expensive fast.
-
Set Your Baseline: Estimate 0.5kg for activewear tops and 1.0kg for hoodies. Heavy packaging often adds 200g to the billable weight.
-
Select the Service: Use DHL or FedEx Express for speed (3-5 days). While a freight forwarder is cheaper, the “timeline drag” of a package stuck in customs for weeks destroys launch momentum. Check current rates on the official DHL Rate Calculator.
-
Define Incoterms: Request DDP (Delivered Duty Paid). This ensures the factory pays all shipping and customs taxes upfront. Avoid EXW (Ex Works), which forces you to arrange pickup from their loading dock.
-
Add a Buffer: Add 20% to your total for peak season fuel surcharges or holiday delays.
Verification: Your logistics budget is realistic only if it equals: (Courier Rate × 3 Rounds) + 20% Contingency.
⚡ Speed Verification: I found that consolidating samples from multiple vendors into one package via a China-based forwarder saves ~40% compared to shipping three separate envelopes. Ask your factory if they can hold shipments to bundle them.
Step 7: Execute the “3D vs. Physical” Decision Rule
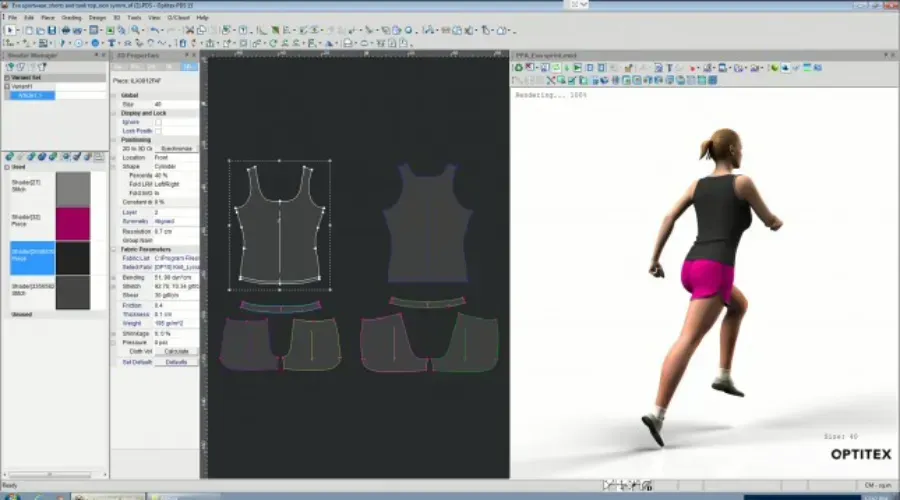
Do not guess where to spend your sampling budget. Use this strict triage matrix to determine when to render digitally and when to cut fabric.
-
Select 3D Sampling (using CLO3D or Browzwear) for complex paneling or high fit risks. In my experience, adjusting a digital seam takes 15 minutes, whereas re-sewing a physical sample takes 5 days.
- Action: Request the Tension Map (heat map). Look for “red zones” where the garment restricts movement.
-
Default to Physical Sampling if fabric performance drives the design. 3D cannot accurately simulate the “hand feel” of acid-wash finishes or the snap-back of high-compression knits.
-
Update Budget Lines:
-
3D: Asset Creation (Pattern conversion) + Rendering Fees.
-
Physical: Cut & Sew Labor + Courier Costs (DHL/FedEx).
-
-
Verify Deliverables: For 3D, ensure you receive the .zprj (Project File) and measurement chart. For physical, require the actual prototype.
🧠 Author’s Verdict: Don’t choose one; chain them. We typically run the first two fit iterations digitally to save weeks of shipping time, then cut the final “Golden Sample” physically for sensory approval. This hybrid workflow (standard in [LeelineWear’s 3D + physical sampling]) secures the fit and the feel while reducing courier costs.
Step 8: Run the Technical Sensory Audit
Do not rely on a mirror check. In my experience, visual checks miss structural defects that ruin bulk orders. You must inspect the garment on a flat table to catch manufacturing errors.
-
Measure Tolerances: Check key Points of Measure (POMs) against your Tech Pack. Note deviations larger than 0.5cm.
-
Test Stitch Tension: Stretch seams aggressively. If you hear “cracking,” the tension is too tight. Look for Tunneling (fabric puckering).
-
Verify Grainline: Fold sleeves or pant legs. If seams torque toward the front, the fabric was cut off-grain. Reject this immediately.
-
Check Recovery: Stretch knit fabric 5 inches and release. If the edge remains wavy, the elastane quality is poor.
-
Perform a Wash Test: Launder the sample. Check for shrinkage, color bleeding, or peeling prints.
Create the Revision Brief
Do not send vague emails. Create a specific PDF brief:
-
Annotate Photos: Draw arrows pointing to specific defects (e.g., “Uneven hem height”).
-
Update the Spec: Adjust measurements in the Tech Pack based on the sample’s fit.
🧠 Author’s Verdict: The Approval Logic Never approve bulk production based on a “Fit Sample.” I always require a Pre-Production Sample (PPS)—made with actual bulk fabric and trims—for the final sign-off. If the PPS fails the touch test, the bulk order will fail the market.
Contact LeelineWear for sample + production planning
Troubleshooting Common Sampling Budget Failures
In my decade managing production lines at LeelineWear, I’ve found 90% of budget overruns happen when brands treat the factory like mind readers.
Here is how I fix the specific failure points that inflate clothing sample cost.
Error: “Sample Quote is 3x Higher Than Expected”
Likely Cause: You are paying for one-off setup fees and priority labor to stop a bulk line for a single unit. The Fix:
-
Request Itemization: Ask to see the split between “Mold Fees” (hardware) and “Labor.”
-
Negotiate Credit: Ask: “Is this sample fee creditable toward a 500-unit bulk order?” We often credit 50–100% back upon the bulk deposit.
-
Consolidate: Use stock zippers for the fit sample. Only pay for custom hardware on the final pre-production unit.
Error: “Every Round Still Has New Issues”
Likely Cause: Vague emails like “make the sleeves tighter” instead of specific data updates. The Fix:
-
Stop Emailing Paragraphs: Use an Excel Change Log with photos. Circle the error in red.
-
Update the Source: Type new measurements directly into the Tech Pack chart. Factories follow the chart, not the email chain.
Error: “Fit is Good in Medium, Wrong in XL”
Likely Cause: The factory applied a math formula (+2cm) without testing human anatomy. The Fix:
-
Order a “Jump Size” Run: Test sizes XS, M, and XL before bulk production.
-
Define Tolerance: In your contract, state that any variance over ±0.5 inches (refer to ASTM D6193 standards) is a factory expense, not yours.
Error: “Shipping Costs Are Exploding”
Likely Cause: Sending single zippers or swatches via express courier ($40 base rate per package). The Fix:
-
Batch Feedback: Wait until you have 5+ items to review.
-
Forwarding: Use a China-based freight forwarder to consolidate items from multiple vendors into one box.
Error: “Factory Says ‘OK’ But Delivers Wrong Fabric”
Likely Cause: “OK” often means “I heard you,” not “I understand.” The Fix:
-
Confirm the BOM: Go line-by-line through the Bill of Materials.
-
Require Swatches: Demand a “swatch card” stapled to the sample. If the specific fabric code isn’t written on the card, reject it.
💡 Pro Tip: The “Frankenstein” Method Don’t guess. Sew a rough sample at home using parts of existing clothes (e.g., a Nike hood pinned to a Hanes tee). Sending this physical reference eliminates 80% of pattern guesswork.
📝 Editor’s Verdict: I once saw a founder approve a “Fit Sample” (using substitute fabric) to save $150. He skipped the Pre-Production sample. The bulk order arrived with different stitch tension because the real fabric was thicker. He spent $4,000 on rework. Check our guide on [Internal: clothing sample stages] to catch these errors early.
⚠️ Compliance Warning: Selling Kidswear? Testing is not optional. You must budget for CPSC compliance (lead/phthalates) and drawstring safety. Customs will destroy non-compliant shipments.
People Also Ask About Clothing Sample Cost
1. How much does a clothing sample typically cost?
Most custom cut-and-sew samples range from $50 to $300, depending on complexity. In my experience, a simple t-shirt might cost $80, while a technical waterproof jacket often exceeds $400. Remember to budget for the courier fee (approx. $50 via DHL), which is rarely included in the base price.
2. Why is the sample price so much higher than the bulk unit cost?
You are paying for manual engineering, not just materials. When we make a sample in our China facility, a master technician must stop the automated line, hand-cut the fabric, and re-calibrate machines for a single unit. This disruption costs us time, so we charge a premium—usually 3x to 5x the target bulk price.
3. Can I get the sample fee refunded?
Yes, but it is conditional. Most manufacturers, including LeelineWear, treat the sample fee as a deposit. We typically credit this amount back to your balance once you place a bulk order meeting the MOQ (usually 300–500 units). Always confirm the specific refund threshold in your initial written agreement.
Conclusion
You now have a repeatable system to forecast your clothing sample cost without guessing. By treating sampling as a staged investment rather than a one-off expense, you protect your cash flow and ensure your final product matches your vision.
Your Immediate Next Steps:
-
Collect Quotes: Get 2–3 itemized estimates. Use the [LeelineWear homepage] to connect directly with our factory team.
-
Choose Your Path: Decide if you need speed (3D sampling) or tactile verification (physical only). Review our guide on [clothing sample stages] to see which fits your timeline.
-
Set Approval Gates: strict sign-offs for Fit, Size Set, and Pre-Production samples.
-
Lock the BOM: Confirm every trim and fabric code before authorizing bulk.
Whether you hire a freelance [technical designer vs fashion designer] or rely on our in-house R&D, document every revision. Strict version control is the only way to keep your budget intact.
Ready to build?
, and let’s turn your tech pack into a production-ready sample.Related reading: Costing your first run? See our guide to clothing manufacturers in China for ten factories ranked on MOQ, sampling, and QC. Then compare which development model you are paying for in OEM vs ODM for sportswear.
Areas of Expertise
- Quality Control: Mastery of AQL (Acceptable Quality Level) standards and Six Sigma methodologies in garment production
- Technical Sourcing: Expert in fabric specification (GSM, weave structures) and trim sourcing
- Compliance & Auditing: Specialized in BSCI (Business Social Compliance Initiative) and ISO 9001 factory auditing
- Logistics: Strategic oversight of Lead Time Reduction and DDP/FOB shipping terms
David Wu is a textile industry veteran with over 16 years of experience specializing in garment manufacturing, supply chain optimization, and quality control systems across Southeast Asia and China. His career is defined by implementing rigorous AQL 2.5/4.0 inspection protocols for mid-to-large-scale private label brands. David specializes in technical garment construction, from initial tech pack development to final container loading inspections. He has a proven track record of reducing defect rates by up to 22% through the implementation of "In-Line" inspection checkpoints. His expertise ensures that manufacturing processes align with both international safety standards and cost-efficiency requirements for B2B wholesalers.