How to Master Clothing Sample Stages: The Step-by-Step Production Timeline
Treating sampling as creative exploration rather than a rigid manufacturing protocol is the fastest way to drain your budget. In a professional factory environment, clothing sample stages function as a strict risk mitigation system where every prototype serves as a distinct quality gate.
This guide maps the standard production lifecycle: Tech Pack → Proto → Fit Cycle → Pre-Production (PP) → Top of Production (TOP) → Shipment. You will learn to translate critical acronyms like SMS and PP into plain English and understand why manufacturers use these steps to validate technical specifications before bulk production begins.
We have included a downloadable checklist you can use with any sportswear supplier. Whether you run agile micro-runs or large-scale orders for athletic apparel, mastering this sequence allows you to turn vague feedback into a predictable delivery schedule.
What You Need Before Sampling

Minimum Viable Brief
-
Design Intent: Define the target customer, specific use-case (e.g., high-impact compression), and performance requirements.
-
Commercial Terms: Target FOB price range + Target MOQ (e.g., 100 vs. 5,000 units) to ensure realistic quotes.
-
Visuals: Reference images distinguishing “must-have” construction details from flexible aesthetic choices.
Access & Tooling
-
Software: Adobe Illustrator (.ai) for artwork/labels and Excel/Google Sheets for tech packs.
-
Fit Station: Live fit model or dress form + standard tailor’s tape.
-
Revision Tracking: Centralized version control (PLM-lite or Master Spreadsheet). Do not manage revisions via WhatsApp.
-
Partner: Verified manufacturing capabilities to ensure direct factory access rather than a trading intermediary.
Standards & Compliance
-
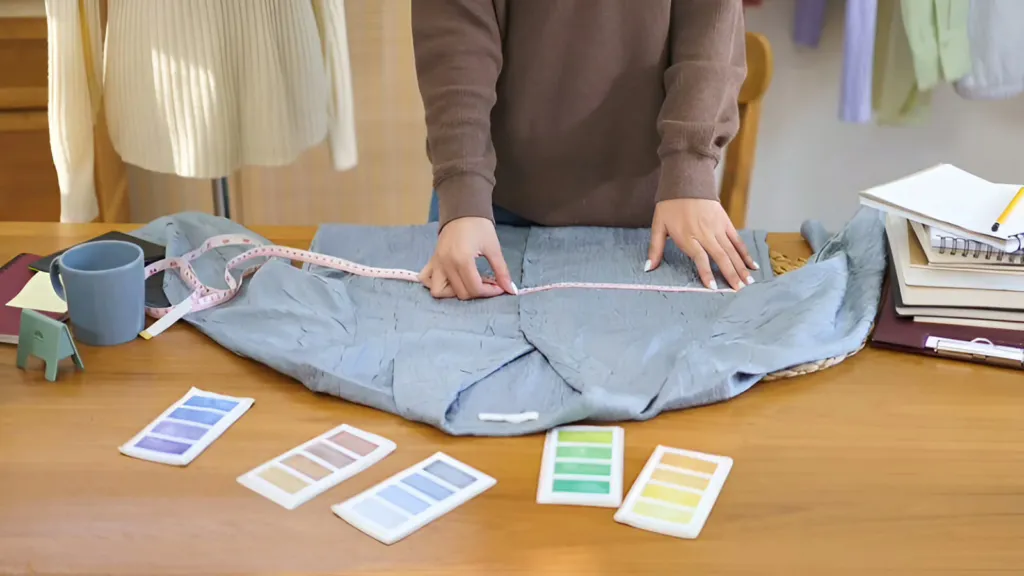
Measurements: Agreed base size standard and documented fit model body measurements.
-
Chemical Safety: Restricted substances alignment for skin-contact items. Reference the OEKO-TEX Standard 100 for compliant inputs.
-
Labeling: Fiber content, care instructions, and Country of Origin (COO) defined early to prevent re-labeling.
-
IP Protection: Signed NDA before sending graded specs or vector artwork.
Assets & Support
-
Download: Sampling Timeline Checklist (Proto → Fit → PP → TOP).
-
Note: Technical consultation is available later in this guide if you lack internal R&D resources.
⚠️ Safety First: Never issue verbal approvals. Define “Approval” strictly as a written sign-off (email or portal) referencing a specific, dated sample tag number.
Step 1: Initialize the “Time & Action” (T&A) Calendar
Turn your sampling process into a managed project to prevent launch delays. Open a spreadsheet and define columns for Task, Owner, Target Date, and Status.
Step 2: Establish Three “Stop/Go” Gates
Enforce strict approval checkpoints. Production must stop until the Brand issues a formal sign-off for the current gate.
-
Gate 1 (Tech Pack Lock): Finalize the Bill of Materials (BOM) and freeze the file version (e.g., TP_v1.0).
-
Gate 2 (Fit Approval): Verify measurements via a physical prototype or 3D Virtual Sample. Issue a “Gold Seal” (approved counter sample) to lock the fit.
-
Gate 3 (PP Approval): Authorize the Pre-Production (PP) sample made with bulk fabric. This triggers the green light for mass cutting.
Step 3: Assign Ownership and Duration
Clearly designate responsibilities to avoid communication gaps. The Factory owns execution (patterning, sourcing, sewing); the Brand owns rapid feedback.
Copy these baseline ranges into your T&A. Add 2–4 weeks if your design requires custom fabric dyeing or knitting.
| Stage | Owner | Standard Duration | Common Delay Signal |
|---|---|---|---|
| Proto/3D Sample | Factory | 7–14 Days | Missing BOM items or vague sketches |
| Fit Review | Brand | 2–5 Days | Brand delays measuring the sample |
| Revisions | Factory | 7–10 Days | Scope creep (changing design mid-process) |
| Sample Courier | Logistics | 3–5 Days | Customs holds or incorrect addresses |
| PP Sample | Factory | 10–14 Days | Trim sourcing lead times |
⚠️ Pitfall: Never approve a flawed sample just because the launch date is close. This guarantees costly errors in mass production.
🚀 Actionable Insight: Add a 10-day “Red Zone” buffer for time-zone lag. Double this buffer if your timeline overlaps with Lunar New Year or August shutdowns.
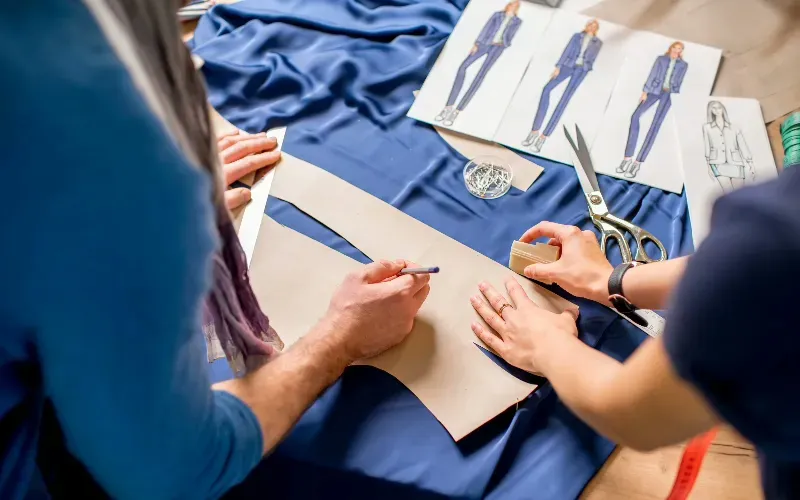
Step 4: Construct the Technical Package (Tech Pack)

Use Adobe Illustrator or Excel to build your Tech Pack. This document acts as the universal language for manufacturing and serves as a binding contract for quality. A factory cannot provide an accurate quote or proceed to clothing sample stages without it.
Compile these five practical components into a single PDF:
-
Technical Flats: Render 2D front and back views. Label components by name (e.g., “Neck Label”) rather than visual cues to ensure clarity.
-
Measurements (POMs): List Points of Measure for the base size (e.g., ½ Chest, Across Shoulder).
-
Grading Rules: Define value jumps between sizes (e.g., +2cm) or the planned size range.
-
Bill of Materials (BOM): Itemize fabrics, Tex 40 thread, trims, labels, and packaging.
-
Colorways: Embed vector artwork and specify Pantone TCX codes. Consult the official Pantone Connect database for exact references.
Define Construction Explicitly Factories cannot quote based on assumptions. Do not write “sew it nicely.” Specify the machine and method, such as “4-needle 6-thread flatlock stitch” or “single-needle topstitch at 3mm.”
⚠️ Real-World Pitfall: Subjective feedback like “make it more premium” is legally unenforceable. Always use measurable specifications, such as “280 GSM Cotton/Spandex Blend with Carbon Peached Finish.”
⚡ Power Move: Include “must match” reference photos for critical details and list “acceptable alternatives” for trims. This prevents delays if specific materials are out of stock.
🔍 Verification: Apply the “Stranger Test.” Hand the file to someone unfamiliar with your brand. If they can build the product using only this file, it is production-ready.
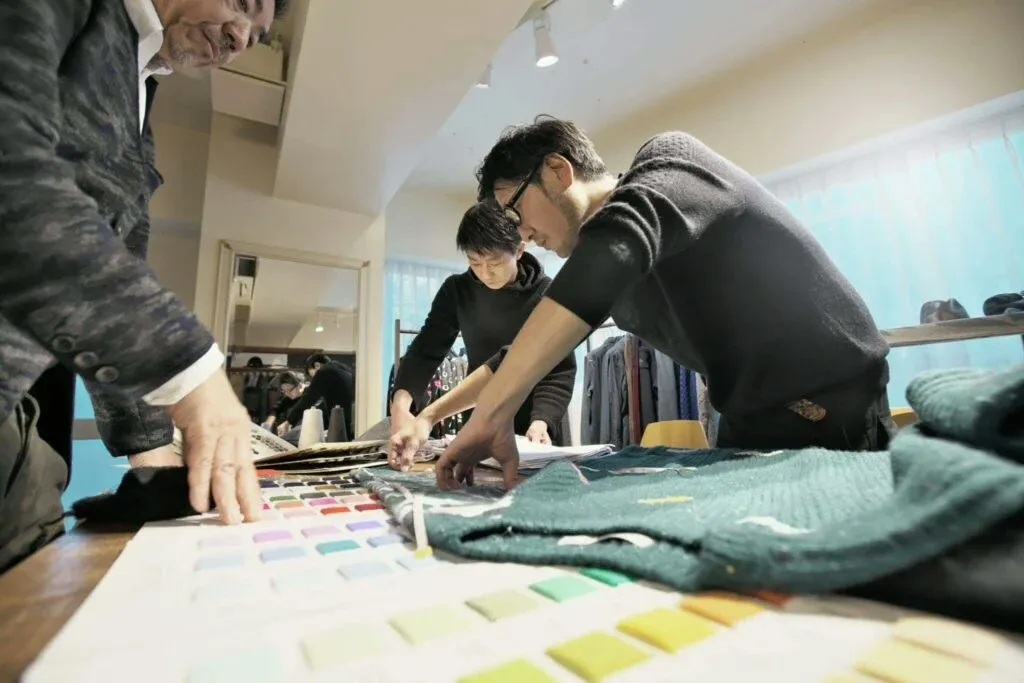
Step 5: Approve Raw Materials and Estimate Costs
Do not authorize sewing until you validate raw materials and audit the initial invoice. Sampling costs often run 3–5x the production target because they cover one-off pattern cutting, sourcing minimums, and setup fees.
Review your quote against this matrix to identify budget leaks:
| Cost Driver | Low Cost Impact | High Cost Impact |
|---|---|---|
| Fabric Source | Stock “Market” Fabric | Custom Knit/Woven Greige |
| Coloration | Available Colors (Stock Card) | Custom Lab Dips (Pantone Match) |
| Complexity | Standard Seaming | Paneled, Lined, or Quilted |
| Trims | Standard Zippers/Buttons | Custom Molded Pullers/Toggles |
Execute the Material Approval Sequence
Request these three physical items for sign-off before the factory cuts fabric.
-
Fabric Swatches: Evaluate hand-feel, opacity, and drape. Verify weight (GSM) against ASTM D3776 standards. If you cannot receive physical swatches, demand high-resolution video of the stretch recovery.
-
Lab Dips / Strike-Offs: Compare dyed swatches to your Pantone TCX codes under natural light.
-
Trim Cards: Test the functionality of zippers, snaps, and elastic mounted on the card.
⚠️ Warning: Never approve color via digital photos due to screen distortion.
⚡ Power Move: Approve materials before the second fit round. If you fit a garment using a rigid substitute fabric and switch to a high-stretch production fabric later, the drape will collapse and invalidate your fit comments. Ensure the “Materials Approved” checklist is signed by both parties before proceeding.
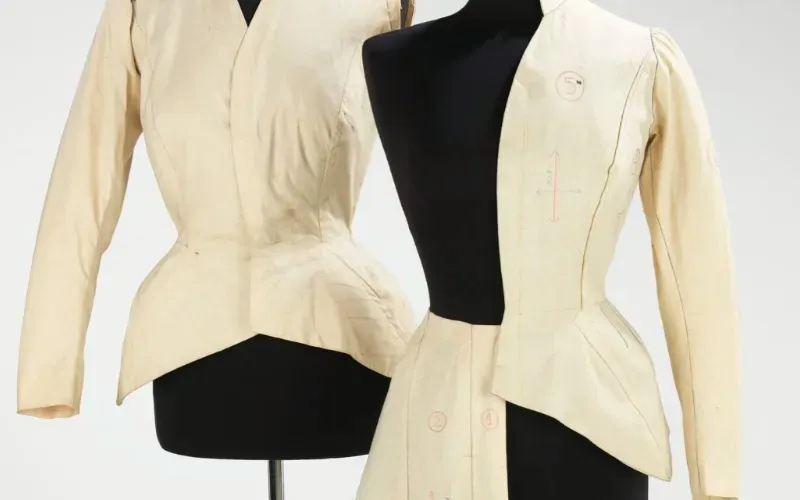
Step 6: Evaluate the First Proto Sample (Proto 01)
Treat Proto 01 as a structural blueprint, not a finished garment. Manufacturers often use “available market” fabric (substitutes with similar GSM and drape) to test feasibility. Focus strictly on silhouette, proportions, and construction logic rather than aesthetic perfection.
1. Perform a Spec Sanity Check Lay the garment flat before the fit session. Measure key dimensions (Chest, Waist, Inseam) against your Tech Pack.
- Action: If measurements deviate beyond standard tolerance (typically >1.0 cm), reject the sample immediately. Do not fit a garment that is fundamentally off-spec.
2. Conduct the Fit Review Place the sample on a live fit model or dress form. If managing production remotely, schedule a video call to assess how the fabric moves and recovers in real-time.
- Capture Evidence: Take standardized photos: Front, Back, Side, and Close-ups of high-tension areas (e.g., armholes, crotch).
3. Annotate Visual Feedback Import photos into your editor to create a precise revision map:
-
Mark Up: Draw clear lines indicating exact adjustments (e.g., “Raise hem 2cm”).
-
Describe: State the issue by location (e.g., “Left underarm seam puckering”) rather than relying solely on arrows to ensure clarity and accessibility.
-
Filter: Ignore minor cosmetic stitching or trim color discrepancies at this stage.
⚡ Power Move: Consolidate all notes into a single Revision Log. Drip-feeding changes across instant messages creates version control chaos.
⚠️ Common Pitfall: Changing ten variables simultaneously without prioritizing them. Label every adjustment as Critical (Must-Fix) or Preference (Nice-to-Have) to prevent the factory from over-correcting and ruining the fit.
Verification: You have a Proto Feedback Template linking every visual issue to a specific measurement adjustment.
Step 7: Conduct the Fit Verification and Lock the Pattern

The Fit Sample exists to lock measurements and range of motion before mass production. Do not treat this as a fashion show; treat it as a data collection event.
Set the Fit Standard
Consistency is non-negotiable. Use a professional dress form or a live model with measurements recorded against ASTM D5219 standards. If the model’s measurements fluctuate, your production quality will fail.
Run the Fit Session
Execute this workflow for every revision:
-
Measure vs. Spec: Lay the garment flat and verify dimensions against your Tech Pack. Note any deviations.
-
Sensory Check: Perform a blind feel test. Check for restrictions, fabric torque (twisting seams), or waistband roll-down.
-
Stress Test: Squat, reach, sit, and stretch. Activewear must perform under dynamic stress without riding up.
-
Document: Take standardized photos (Front, Side, Back) and video clips of the movement test.
Write Engineering Directives
Manufacturers cannot interpret feelings. Translate sensory feedback into Location + Direction + Value instructions.
-
Weak: “The sleeves feel too long.”
-
Strong: “Sleeve Hem: Shorten by 1.5 cm.”
Maintain a Change Log (e.g., Rev A to Rev B) to track pattern evolution.
Create the Gold Seal
Once approved, tag the final unit as the Gold Seal Sample (or Counter Sample). Sign and seal this garment in a bag. It becomes the “master key” for quality control; if bulk production does not match the Gold Seal, reject it.
⚠️ Warning: Never change fit, fabric, and construction in the same round. You will be unable to attribute failure to a specific variable.
⚡ Power Move: Limit revisions to the top 3–5 highest-impact structural issues per round to stabilize the pattern.
Verification: You have a “Fit Sample Feedback Pack” ready with annotated photos, specific measurement adjustments, and approval language.
Step 8: Order Salesman Samples (SMS) and Size Sets
With the base pattern locked, the production path splits based on your business model. You must now verify the garment scales correctly across sizes and create physical assets for sales.
1. Validate Grading with a “Size Set”
Do not assume a pattern graded for a Medium will translate perfectly to an XXL. Order a Size Run (jump sizes: XS, M, XL) to verify the grading logic.
- The Check: Measure every point against your grading chart. Ensure proportions scale logically; a pocket placed correctly on a Medium may look tiny or misaligned on an XXL.
2. Secure the Salesman Sample (SMS)
The SMS is a polished, “retail-ready” prototype used for wholesale line sheets or photography. Unlike fit samples, all finishing details must be final.
- Packaging & Labels: Verify Care Labels comply with FTC labeling requirements. Confirm Hangtag placement and Polybag safety warnings are present and correct.
Decision Matrix: Which Sample Do You Need Next?
| Business Goal | Required Sample | Purpose |
|---|---|---|
| Wholesale / Retail | SMS Run | Show buyers the full collection 6 months before launch. |
| Direct-to-Consumer | Photo Sample | Create e-commerce content and social ads. |
| Manufacturing Only | Size Set | Verify sizing consistency before cutting bulk fabric. |
⚠️ Warning: Never use a Fit Sample for marketing. Fit samples often use temporary trims (e.g., substitute zipper colors). Marketing these discrepancies can lead to “Item Not as Described” returns when the final product arrives.
🚀 Actionable Insight: Ultra-lean DTC brands should skip the full SMS batch. Instead, order a single Photo Sample made with final trims and fabric to shoot marketing content while the factory prepares for bulk production.
Step 9: Authorize Pre-Production (PP) & Set Quality Gates
The Pre-Production (PP) Sample is the “Point of No Return.” This is not a rough draft; it is the binding contract for your bulk order. You must confirm this sample is manufactured using the exact bulk fabric, final trims, and production-line machinery—not by a skilled sample sewer in a separate room.
Execute the “Production Reality” Checklist
Do not approve based on aesthetics alone. Stress-test the sample to predict bulk behavior:
-
Wash & Torque: Wash and dry the sample 3–5 times immediately. Reject the sample if Shrinkage exceeds 5% or if side seams twist (torque).
-
Workmanship Consistency: Count the stitches per inch (SPI). If the PP has 12 SPI but the bulk setting is 10, the seams will fail.
-
Sensory Stress Test: Cycle zippers 50 times. Stretch elastics to verify recovery. Stretch printed areas to check for ink cracking.
-
Label Compliance: Ensure care instructions match FTC Care Labeling Guidance.
Define the Quality Control (QC) Plan
Enforce three specific gates during manufacturing to prevent scaling errors:
-
Inline Inspection: Review photos when production is 20% sewn. (See our Agile Manufacturing Overview for inspection protocols).
-
Top of Production (TOP): Inspect the very first units off the packing line. If the TOP differs from the PP (e.g., stiffer hand-feel), pause production immediately.
-
Final Random Inspection (FRI): Mandate an ISO 2859-1 (AQL) check before final payment.
⚠️ Warning: Beware of Silent Substitution. Factories may produce a perfect PP with premium zippers, then switch to generic bulk alternatives. Explicitly state: “Bulk BOM must match PP exactly.”
🚀 Power Move: Require video evidence of TOP units being measured on the table. This prevents the factory from sending a “Gold Sample” kept in the office while the bulk run deviates.
Verification Output: PP Approval Email Script + TOP QC Checklist
Unsure if your timeline allows for a full wash test cycle? Request a Sampling Timeline Review.
Troubleshooting
Failures during clothing sample stages rarely stem from incompetence; they usually result from ambiguous instructions. Use this diagnostic framework to rescue a stalling production line.
1. Error: “The sample is ‘not what I pictured’”
-
Likely Cause: Tech Pack Gaps. You relied on subjective text (e.g., “make the collar smaller”) rather than visual data, prompting the factory to use their standard defaults.
-
Fast Fix: Overlay a photo of the failed sample against your reference image. Draw red circles around mismatches and annotate exactly what needs to change in millimeters.
-
Prevention: Add a “Construction Callout” page to your Tech Pack. Explicitly label “Must-Match” details versus “Factory Standard” tolerances.
2. Error: “Fit keeps getting worse”
-
Likely Cause: Variable Overload. You changed the fabric, the pattern, and the fit model simultaneously. This creates a “Frankenstein” sample where the root cause of the fit issue is untraceable.
-
Fast Fix: Lock the base size. Revert to the previous pattern version and change only one variable (e.g., just the fabric) for the next review.
-
Prevention: Enforce strict Change-Log Discipline. Never issue a new round without a written list of changes.
3. Error: “PP doesn’t match the approved fit”
-
Likely Cause: Method Drift. The Fit Sample was sewn by a skilled artisan, but the Pre-Production (PP) unit was made on the automated assembly line.
-
Fast Fix: Reject the unit immediately. Demand the factory calibrate line machinery to match the stitch tension of the Gold Seal sample.
-
Prevention: Mandate a Top of Production (TOP) checkpoint. Do not authorize shipping until the first unit off the actual line is measured.
Operational Bottlenecks
-
Trim Delays: Do not wait for fit perfection to approve hardware or colors. Parallelize lab dips and trim sourcing with pattern making to avoid stalling bulk production.
-
Communication Chaos: Fragmented feedback (WhatsApp + Email + WeChat) causes version control errors. Centralize all edits in one master Revision Log to eliminate ambiguity.
💡 Diagnostic: When to Switch Factories Sampling is iterative, not infinite. If a factory ignores your Revision Log for two consecutive rounds, they are likely outsourcing your order to a sub-tier workshop. Switch suppliers before paying the bulk deposit.
🛡️ Prevention: Standardized Naming Ambiguous filenames like Final_v2.pdf cause costly errors. Use a strict convention: Style_Stage_Rev_Date (e.g., Legging-01_Proto2_RevB_Oct12.pdf). This ensures the cutter uses the correct file.
Take a deep breath. Sampling problems are normal; unmanaged problems are expensive. Catching these issues now saves thousands of dollars in the bulk run.
People Also Ask About Clothing Sample Stages
Why does the sampling cost 3 to 5 times more than the bulk unit price?
Sampling fees cover high-overhead engineering tasks rather than just materials. This cost includes creating the initial paper patterns, grading sizes, calibrating machinery for a single unit, and sourcing fabric below factory minimums. However, reputable partners often treat this as a deposit; at LeelineWear, we typically deduct the initial sampling fee from your final invoice once a bulk order meeting the MOQ is placed.
What is the difference between a PP Sample and a TOP Sample?
The Pre-Production (PP) sample is a “permission to cut” contract; it proves the factory understands the Tech Pack using the correct bulk materials. The Top of Production (TOP) sample is a quality control checkpoint pulled from the actual assembly line during mass manufacturing. You approve the PP to start production; you check the TOP to ensure the machinery was calibrated correctly before shipping.
Can I use a Fit Sample for my photoshoot to save time?
No, this is a high-risk strategy. Fit samples often utilize “available market” fabric (substitutes) and temporary trims just to test the silhouette. Using these for e-commerce photography risks false advertising claims if the final bulk product differs in texture, color, or drape. Always order a specific Salesman Sample (SMS) or Photo Sample with final finishings for marketing assets.
How long does the full clothing sample timeline take?
A standard professional development cycle takes 30 to 60 days from Tech Pack to Production approval. This breaks down roughly into: 7–14 days for prototyping, 5–10 days for material sourcing, and 10–14 days for the PP sample, plus shipping transit times. Attempting to compress this timeline below 30 days significantly increases the error rate in fit and construction.
Related Resources:
-
Sportswear manufacturers China vs Europe: Which is Better for Your Supply Chain?
-
How to finding sportswear manufacturers: From Tech Pack to First PO
Conclusion
Mastering clothing sample stages requires shifting your mental model from “designing” to “engineering.” Each stage discussed—from the initial Proto to the final Top of Production (TOP) unit—answers a specific question about direction, fit, and manufacturing reality. You are not “done” until your tech pack is locked, your Gold Seal fit is approved, and your Quality Control plan is set.
Ready to move from concept to calibration? Explore our manufacturing capabilities and services to see how our agile production lines handle both micro-runs and mass volume.
Final Recommendation: Maintain a digital “Golden Archive” for every product. Keep the signed approval emails, the final revision log, and the physical Gold Seal sample safe. If a dispute arises regarding production quality, these assets are your only leverage to ensure consistency in future reorders.

Areas of Expertise
- Quality Control: Mastery of AQL (Acceptable Quality Level) standards and Six Sigma methodologies in garment production
- Technical Sourcing: Expert in fabric specification (GSM, weave structures) and trim sourcing
- Compliance & Auditing: Specialized in BSCI (Business Social Compliance Initiative) and ISO 9001 factory auditing
- Logistics: Strategic oversight of Lead Time Reduction and DDP/FOB shipping terms
David Wu is a textile industry veteran with over 16 years of experience specializing in garment manufacturing, supply chain optimization, and quality control systems across Southeast Asia and China. His career is defined by implementing rigorous AQL 2.5/4.0 inspection protocols for mid-to-large-scale private label brands. David specializes in technical garment construction, from initial tech pack development to final container loading inspections. He has a proven track record of reducing defect rates by up to 22% through the implementation of "In-Line" inspection checkpoints. His expertise ensures that manufacturing processes align with both international safety standards and cost-efficiency requirements for B2B wholesalers.