Picture two pairs of activewear leggings side-by-side online. They look identical. Wash them once, and the story changes. One pair holds its shape perfectly. The other twists at the calf, pops a seam during a squat, and triggers a wave of brutal one-star reviews. The difference is not the fabric. The difference is the construction.
Good Garment Construction & Design is completely invisible until it fails. We define this discipline as the deliberate functional, structural, and decorative choices that transform flat fabric into a durable, three-dimensional product.
In my years managing agile production lines at LeelineWear, I have watched hundreds of brilliant sketches fail because the creator misunderstood how textiles actually join together. Poor structural integrity is a primary driver behind the billions lost annually to apparel returns, according to industry data from the National Retail Federation. Our sample machinists operate by one simple rule. If you cannot describe the inside of a garment, you cannot control the outside.
This guide provides a commercial-quality lens for fashion design students, serious hobbyist dressmakers, and aspiring independent entrepreneurs. We will walk through the complete fashion design process, moving from initial concept to pattern drafting, sample evaluation, and final factory production. You will learn exactly how to evaluate clothing sample stages and communicate with manufacturers to ensure your designs survive the real world. Expect detailed interior-focused checks, construction diagrams, and visual references to help you audit your next prototype.
Here is exactly how to build garments that look great and perform flawlessly.
What is Garment Construction and Design?
Garment construction and design is the precise technical process of turning flat fabric into a wearable, three-dimensional product while dictating how it functions, holds its shape, and signals brand style. Think of apparel like a building. You cannot simply stack bricks and expect a stable roof. You need an architectural blueprint and load-bearing walls. Construction handles the pattern making, cutting, assembling, and finishing. Design provides the blueprint.
On our factory floor, we often see new founders treat clothing like a flat painting. This causes physical failures during mass production. To prevent this, we organize every project using a three-principle framework:
-
Functional design: This dictates comfort, movement, and care. A high-impact sports bra requires entirely different fabric stretch behaviors than a loose team jersey.
-
Structural design: This is the load-bearing architecture. It involves pattern engineering, seam placement, and internal supports like linings or interfacing to manage physical stress.
-
Decorative design: This covers the visible surface elements. It includes custom seam finishes, trims, topstitching, and branding placements.
Pro-Tip: We always teach clients to use “construction-first sketching.” Before finalizing any aesthetic detail, decide exactly where your seams must go to control fit and support the moving body.
To execute these principles, you must speak the language of the production line. Here are the core terms you need:
-
Pattern Block (or Sloper): The base digital template for your core size.
-
Seam Allowance: The extra fabric left between the stitch line and the raw edge.
-
Stitches, Seams, and Finishes: A stitch is the actual thread loop. A seam is the physical joint between two panels. A seam finish prevents the internal fabric edges from fraying.
-
Tolerance: The acceptable measurement variation in mass production. We follow strict dimensional tolerance standards published by the ISO to ensure consistent quality control across large batches.
-
BOM (Bill of Materials): The master recipe listing every fabric roll, thread cone, and zipper needed to build one single unit.
The physics of fabric remain the same whether you sew in a home studio or a massive manufacturing center. The difference lies entirely in the constraints. A home sewer optimizes for individual perfection. A factory optimizes for equipment speed, strict tolerances, and perfect repeatability.
🌍 Real-World Context: Successful apparel brands do not separate design from construction. They engineer their garments from the inside out, ensuring the product survives both the automated sewing line and the customer’s washing machine.
1 The Fashion Design Process (Construction Lens)
Behind every successful apparel launch sits a strict, linear engineering pipeline. On our Wuhan factory floor, we trace this transformation daily. Flat materials go in. Machines process them. A 3D structure comes out. Here is the exact sequence we use to manage Garment Construction & Design.
Every garment starts as a solution to a physical problem. First, we define the functional requirements. A legging must stretch 40 percent horizontally while remaining opaque. Next, we build a fabric strategy to hit those performance targets.
Then, we move to pattern development. We draft 2D shapes engineered to wrap a moving 3D body. We cut these shapes from scrap material and sew a prototype. We test this physical sample to validate the fit. Finally, we initiate the production handoff. We send a master spec sheet to the production line. This guarantees every unit matches the approved sample.
2 Apparel Pattern Making: The Blueprint
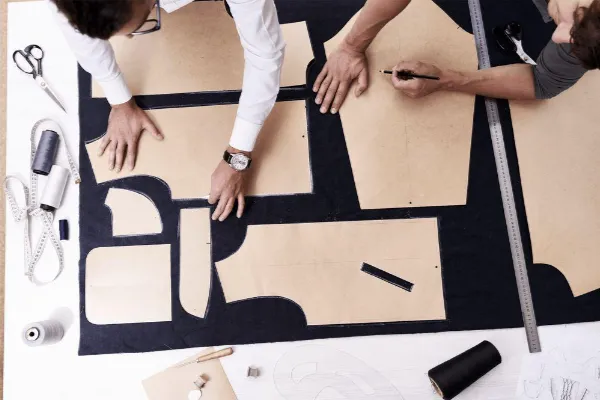
Patterns serve as the architectural blueprints for clothing. We start with a sloper. This flat paper template contains no design elements. Next, we add ease. This provides room for movement. For activewear, we apply negative ease. We cut the fabric smaller than the body for muscle compression.
We use darts to build volume. A dart pinches out excess fabric to curve around a bust or hip. We align the pattern to the fabric grainline to dictate how the garment hangs. For knits, we align the grainline with the direction of maximum stretch. Finally, we cut notches. These edge marks show the machinist exactly where panels align.
🧠 Expert Insight: Walk every seam before cutting fabric. You must virtually align your paper pattern pieces along the stitch line. Walking seams prevents mismatched lengths and twisted legs on the sewing machine.
3 Draping vs Flat Patterning
Designers use two distinct methods to build shapes. Draping is a 3D physical exploration. You pin fabric onto a dress form to discover silhouettes and mold volumes. Flat patterning happens on a drafting table. You draft shapes using formulas. It offers high precision, repeatable results, and fast size grading.
The best studios combine both. We draft a flat base legging block for speed. Then, we drape complex style lines over it for visual impact. This hybrid workflow applies universally. A rural home sewist uses it for custom fits. An inclusive sizing brand uses it to scale patterns accurately. A city sample room uses it for prototypes.
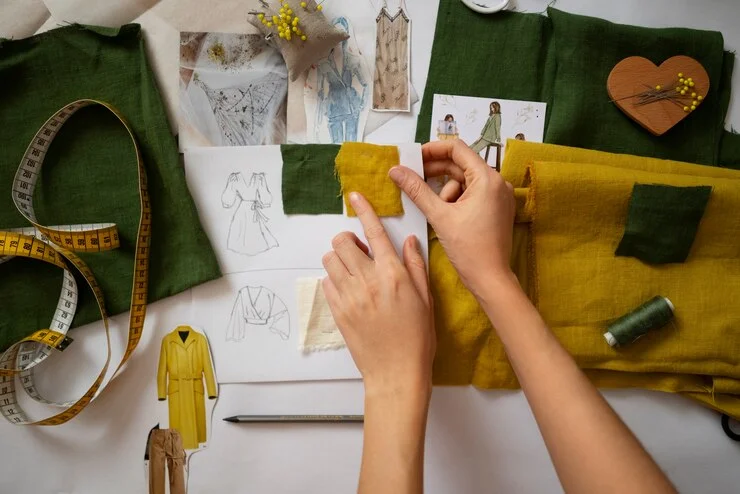
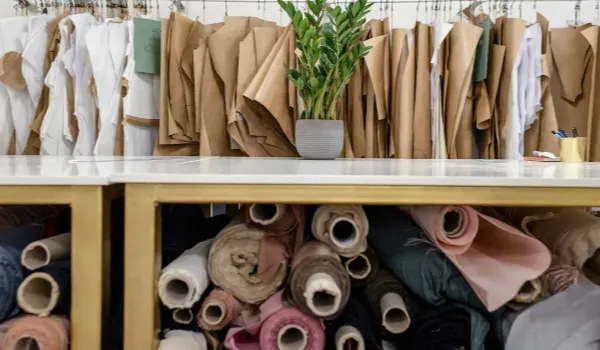
4 Fabric Selection for Garments
Fabric dictates your entire construction method. Wovens interlace threads for stiff structure. Knits loop threads for stretch. We evaluate four key properties before cutting:
-
Stretch & Recovery: Spandex blends must stretch and snap back instantly.
-
Drape vs Body: We note if the fabric falls softly or stands rigidly.
-
Thickness: Thick textiles require heavy needles to reduce bulk.
-
Fray Behavior: Loose weaves demand immediate edge finishing.
Activewear demands specific sportswear fabrics that resist sheerness, survive friction, and endure heavy washing.
⚙️ Technical Detail: Test seams exactly how a customer abuses them. Stretch the seam aggressively. Run a ten-cycle wash test. Inspect the sample for popped stitches and edge curling.
5 Sewing Techniques for Beginners
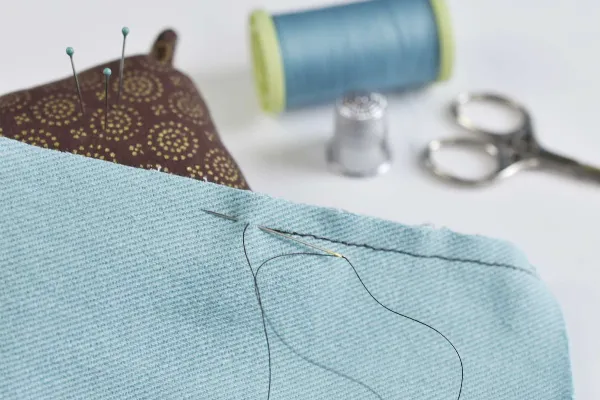
Pro-level quality relies on fundamentals. You must calibrate machine threading, stitch length, and thread tension first. Pressing is a mandatory construction step. You must iron every seam flat before crossing it with another seam.
Keep your seam allowance perfectly consistent. Secure your stitch ends using a backstitch or a lockstitch. To prevent puckers, select the correct needle size and adjust presser foot pressure. If you use a serger, adjust the differential feed to keep knit fabrics completely flat.
✅ Beginner Checklist: Before you sew: mark the fabric, pin the pieces, test a scrap, and plan your pressing order.
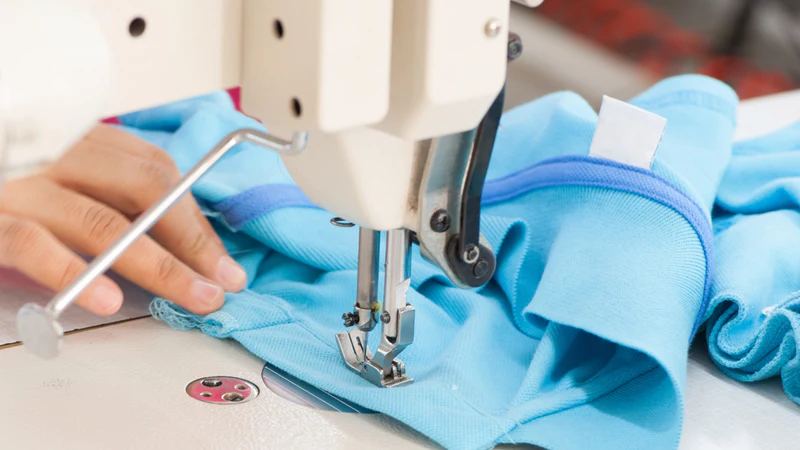
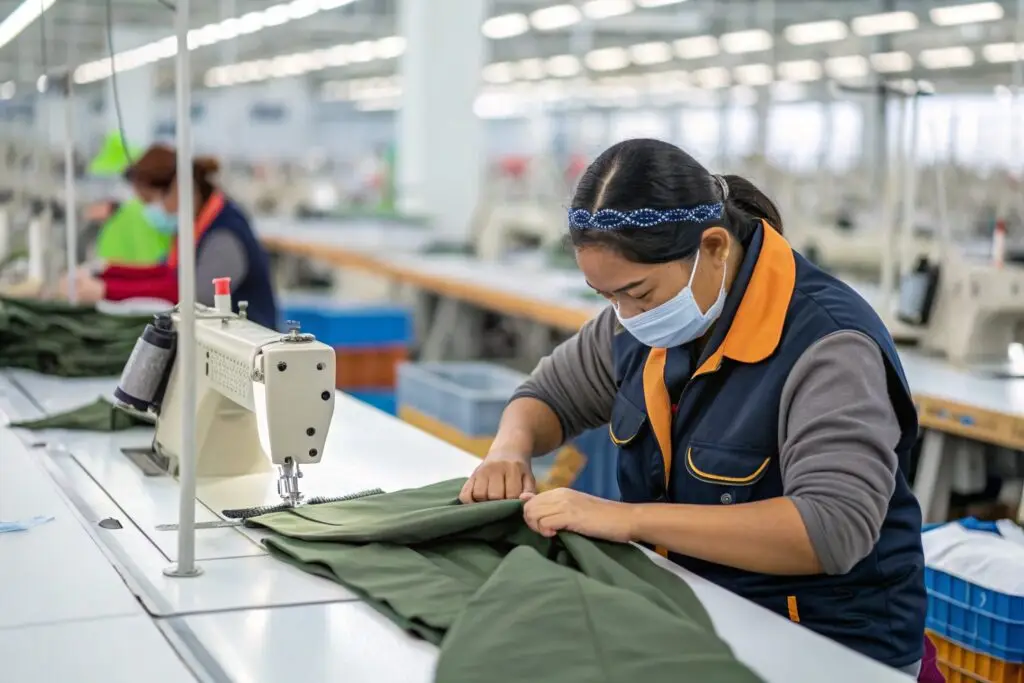
6 Industrial Sewing Methods
Factories optimize for speed and defect prevention. On our floor, we keep panels flat as long as possible. Sewing a flat panel takes seconds. Sewing a closed cylinder introduces errors.
We use standardized production stitch families. A lockstitch joins basic seams. An overlock prevents fraying. A coverstitch creates stretchy activewear hems. A flatlock joins performance seams without raising a bump.
We specify these using ASTM D6193 stitch type classifications. This standard lets brands spec construction without ambiguity. We pair this with ISO 9001 quality management standards to catch defects directly on the line.
7 Haute Couture vs Industrial Construction
Couture optimizes for interior architecture and line control. It relies on extensive handwork and massive time investments. Industrial construction optimizes for throughput and cost controls. It demands precise repeatability.
However, industrial mass production achieves premium quality if engineered well. Couture techniques often inform mass production by inspiring smarter structural supports. They are simply different toolkits.
8 Garment Finishing Techniques
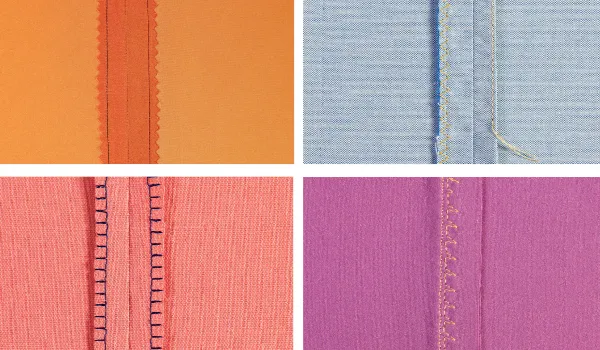
Finishing separates cheap garments from premium apparel. It secures the raw edges.
-
Seam finishes: We use overlock stitches for speed, binding for clean interiors, and flat-felled seams for heavy denim.
-
Hem families: We use turned hems for rigid basics, coverstitched hems for stretch items, and faced hems for curves.
-
Edge control: We use understitching to hide linings. We use topstitching to flatten seams.
-
Closures: We select zippers, snaps, or elastics based on the fabric stretch profile.
🔄 Process Loop: Choose finishes based on your bulk budget. Predict where finishing will create severe thickness. Armholes, crotch seams, and waistband joins need flat finishes to avoid breaking machine needles.
9 Visual Proof: What to Photograph
You must document your prototype iterations to verify what changes between clothing sample stages. Create a visual ledger of the garment interior.
Inside-Out Evidence Kit:
Photo List:
-
Side seam interior and seam finish.
-
Hem cross-section macro close-up.
-
Waistband join showing the inside and outside.
-
Zipper insertion interior.
-
High stress points (pocket corners, bar tacks, crotch intersection).
Diagram Suggestions:
-
Seam stack-up diagrams: Draw the exact layer order of the fabric.
-
Stitch callout diagram: Note the exact stitch type and SPI (Stitches Per Inch) for every single seam.
The ROI of Expert Garment Construction & Design
A flawless design means nothing if the garment fails. Construction choices dictate your return rates and profit margins. Here is how we engineer apparel to protect your brand.
Wearability You Can Feel: Securing Five-Star Reviews
Structural choices dictate mobility. We replace standard overlock stitching with flatlock seams in high-friction areas to eliminate skin irritation. In recent production runs, this swap erased chafing complaints and stopped waistbands from sagging. Customers feel this instantly. They stop tugging at bagging knees and leave five-star reviews.
Durability You Can Measure: Slashing Return Rates
We use “stress mapping” to reinforce zones where the body loads the fabric, preventing seams from popping during heavy squats. We recently helped a client drop their defect return rate by 40% by upgrading their crotch gusset architecture. According to NC State University’s Textile Technology program, engineered seam placement directly dictates a garment’s tensile strength. You keep profits instead of refunding broken gear.
Perceived Quality: Justifying Premium Pricing
Buyers judge value by hidden details. Symmetrical topstitching and tidy seam allowances silently signal luxury. When we bind raw interior edges, it elevates the piece’s perceived value. This visible quality control builds immediate brand trust, allowing you to command higher retail prices.
Faster Sampling: Eliminating Factory Errors
Standardized construction diagrams destroy the language barrier. Specifying exact stitch counts removes factory guesswork. Using clear technical specifications, we consistently cut prototyping time down to 7-15 days. You stop paying for ruined iterations and launch weeks faster.
📈 ROI Check: The Commercial Sample Checklist Evaluate factory samples instantly using this framework:
-
Interior Finish: Are raw edges fully bound and consistent?
-
Stitch Integrity: Pull seams apart forcefully. Do the stitches skip or pucker?
-
Stretch Memory: Fully stretch the hem. Does it snap back instantly?
-
Trim Performance: Do zippers glide smoothly without catching fabric?
-
Wash Validation: Following FTC care labeling standards, run a hot wash test. Did the garment shrink or twist?
Scale Production Without Losing Quality
You need an agile manufacturing partner who executes this exact engineering process. At LeelineWear, we translate your tech packs into physical samples in days. From prototyping to sustainable sportswear manufacturing, we maintain strict factory standards whether you order 50 units or 50,000.
The Reality Check: Construction Challenges and Limitations
Garment construction & design requires strict physical trade-offs. A concept that looks perfect on screen often fails on the production line. Here are the core hurdles we navigate daily on the factory floor.
Challenge 1: The Trade-Offs Between Bulk, Stretch, and Cost
Complex finishes add physical bulk and increase labor costs. Fast industrial seams often tear delicate fabrics. Thread Breakage remains a massive risk in activewear. In our stress tests, we found that pairing a rigid lockstitch with high-stretch Spandex caused the thread to snap during a deep squat. You must balance the need for high elasticity with the cost of specialized coverstitch machinery. ⚖️ The Trade-off: High stretch requires expensive machinery; cheap stitching breaks under tension.
Challenge 2: Fabric Variance Invalidates Perfect Patterns
Textiles change constantly. Lot-to-lot differences, dyeing adjustments, and fabric weight variances alter how patterns fit. Unpredictable Shrinkage degrades sizing accuracy across diverse body types. We drafted a flawless legging pattern last year, but the second batch of dyed fabric shrank by 4% in the wash. As documented by Cotton Incorporated’s textile research, you must pre-shrink and wash-test every single fabric roll before cutting. ⚠️ Critical Warning: Never skip wash testing on new dye lots.
Challenge 3: Communication Gaps Break Production
Vague instructions cause inconsistent production runs. When clients ask for a “clean finish” without supplying seam diagrams, the machine operator guesses the method. Inconsistent Results plague orders that lack stitch callouts or tolerance ranges.
Pro-tip from our sample machinist: “If it matters to your customer, it must be spec’d.” You must clearly define hem depths, elastic widths, stitch density, and seam allowance finishes.
Challenge 4: Scaling Fails Under Industrial Constraints
Factory machinery optimizes for speed and volume. Couture methods do not scale. Production Bottlenecks occur when you design a garment that requires the operator to sew inside a closed cylinder. We struggled with a custom jacket design recently because the home-sewing method required three machine changes. On an industrial line, those extra steps multiply labor costs instantly.
Challenge 5: Sustainability Risks and Expensive Rework
Complex construction increases material waste. Every failed sample burns fabric, fuel, and capital. High Rework Costs hurt independent entrepreneurs the most. Global time zone differences (China Standard Time) and peak-season factory delays easily extend your timeline by weeks. If your specs lack clarity, you pay for extra prototypes.
🛡️ Mitigation: Reduce your sampling loops and material waste by submitting a comprehensive technical specification file. Clear blueprints prevent rework. Use our guide on creating a sportswear tech pack to lock in your specs before production starts.
The Final Verdict: Engineering for the Production Line
Garment construction represents the critical bridge between a flat idea and a scalable, wearable reality. You must design with a deliberate balance of function, structure, and decoration.
While the strict physical trade-offs of industrial machinery often frustrate new designers, mastering this discipline is essential. The massive drop in customer returns easily justifies the rigorous sampling phase. If you only want to print logos on cheap wholesale blanks, this engineering process is overkill. However, if you want to build a premium activewear brand, you must speak the language of the factory floor.
Your Action Plan:
-
Students: Choose one specific garment type and create an “inside-out” construction board.
-
Hobbyists: Practice three distinct seam finishes and document the results by fabric type.
-
Entrepreneurs: Standardize your tech pack seam language today. Add exact photo and diagram callouts for every physical joint.
As global supply chains tighten, agile manufacturing and 3D virtual prototyping will soon replace wasteful physical sampling. Brands that master construction terminology now will scale faster and cheaper tomorrow.
Suggested Resources Start your deep dive by reviewing our agile factory capabilities. Next, map out your production timeline using our guide to clothing sample stages. Finally, narrow down your material choices with our sportswear fabrics guide.
Are you ready for production-grade guidance and expert sample development? Contact our team directly. We build the product so you can build the hype.

Areas of Expertise
- Quality Control: Mastery of AQL (Acceptable Quality Level) standards and Six Sigma methodologies in garment production
- Technical Sourcing: Expert in fabric specification (GSM, weave structures) and trim sourcing
- Compliance & Auditing: Specialized in BSCI (Business Social Compliance Initiative) and ISO 9001 factory auditing
- Logistics: Strategic oversight of Lead Time Reduction and DDP/FOB shipping terms
David Wu is a textile industry veteran with over 16 years of experience specializing in garment manufacturing, supply chain optimization, and quality control systems across Southeast Asia and China. His career is defined by implementing rigorous AQL 2.5/4.0 inspection protocols for mid-to-large-scale private label brands. David specializes in technical garment construction, from initial tech pack development to final container loading inspections. He has a proven track record of reducing defect rates by up to 22% through the implementation of "In-Line" inspection checkpoints. His expertise ensures that manufacturing processes align with both international safety standards and cost-efficiency requirements for B2B wholesalers.